Tag Archives: recipe

Pickled Garlic Scapes

Pickled garlic scapes! Delicious but not well known. Scapes are the flower stems of garlic. Whether you should leave them on the plant or cut them is up to the grower. We like to pickle them. If you love garlic you’ll most likely love scapes, too.  They are garlic’s bonus.

Garlic Scapes

Garlic Scapes

Pick scapes while they are young. I wait until they start to curl so that I have more scape to eat, and pick before the lower portion of the stem starts to get woody and tough. I put my canning jars in the dishwasher and go out to pick scapes. The jars will still be hot when I’m ready for them.

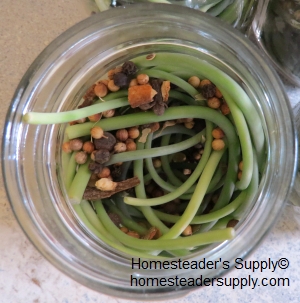
Coil the scapes to make putting them in jars easier. This works well for small mouth jars. Fill the jars to one-half inch from the top.

Pickled Garlic Scape Recipe

For four to five pints mix:

3 cups Apple Cider vinegar
3 cups water
4 tablespoons raw sugar
4 tablespoons salt

Mix well and bring to a boil. While you’re waiting for the boil add two to three teaspoons of pickling spice to each pint jar.

Garlic scapes and pickling spices

Garlic scapes and pickling spices

Pour boiling liquid over scapes, filling jar to one-half inch from the top. Wiggle the jars to remove all air bubbles. Apply lid and screw on ring until it’s finger tight. Finger tight means snug but not so tight that air can’t escape.

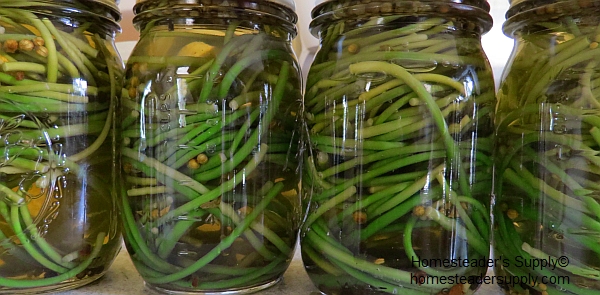
Pickled Garlic Scapes

Pickled Garlic Scapes

Boiling Water Bath

Place a rack in the canner and fill canner with hot water (around 180 degrees) high enough to cover the jars with one inch of water. Bring the water to a full rolling boil, cover the canner and reduce heat to bring the boil down to a light but steady boil for ten minutes. Remove jars from water and place them on a cooling rack out of the breeze. Listen for pops. Each pop indicates a jar has sealed. Re-process jars that don’t seal or place them in the refrigerator and eat them first.

Waiting approximately six weeks to open the first jar makes for the best pickled scapes but that’s not easy to do. I open the first one after a month. They’re not quite there yet but they’re definitely delicious enough to enjoy!


Sourdough bread

A quick and easy sourdough bread recipe

Sourdough bread isn’t supposed to be quick. The starter should ferment until its full flavor develops. The bread should rise slowly in a cool room to allow more flavor to develop. Those air pockets created by the yeast, the ones that hold globs of your butter or olive oil or jam, need time to grow. It’s all very lovely and tasty when you have time to wait, but that’s not how my day is going.

It was 2 pm before I realized we’re out of bread. Normally I mix up my starter, the water, some organic whole wheat flour and unbleached bread flour around 4 pm. I mix and knead by hand, feeling the dough as it changes, knowing exactly when to stop kneading. Then it sits in the bread pan I’ll bake it in, on the counter by the cool outer wall of the kitchen to rise overnight. First thing next morning, around 4:30, I pop the bread into a 400* oven, but that’s not how my day is going.

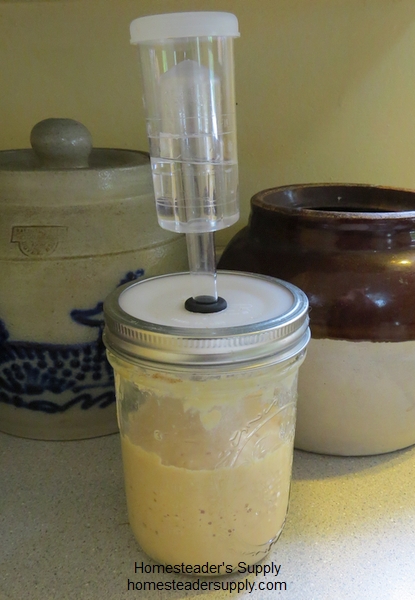
Pickle-Pro sourdough starter

Pickle-Pro sourdough starter

Today I’m making quick and simple sourdough bread so that I can have it with dinner. My starter is kept in a pint canning jar with a Pickle-Pro lid. It’s been the best starter I’ve used. The airlock has kept alcohol from building up on the surface of the starter if I don’t use it fairly quickly.

Sourdough Bread Recipe

Oven: 400*  Bake for 30-40 minutes

1 cup sourdough starter
1 cup warm water, around 100*
1 1/2 cups organic whole wheat flour
Approximately 3 1/2 cups bread or all-purpose flour
2 tsp yeast

I used the mixer today so I could let the mixer do the kneading and unload the dish washer. Use the kneading hook. Add sourdough starter, warm water and yeast to bowl. Turn mixer on and add the whole wheat flour in 1/2 cup increments. Add bread or all-purpose flour in one half cup increments. For the last cup of flour, allow the mixer to knead for a minute. Turn off the mixer and touch the dough. It should be moist but not sticky. The dough should pull away from the sides and be wrapped around the hook. If the dough is sticky add 1/4 cup of flour, knead and check. Experienced bread makers will “just add it” and know when they’ve reached the right look and texture.

Oil two bread pans with olive oil or butter if necessary. Today I need bread for sandwiches so I’m not looking for a loaf with a big rounded top. I like a wide loaf with a flat top so that a slice holds a nice amount of sandwich filling with one slice of bread. Remove the dough from the mixer and set aside to rise until it has doubled in size. Gently slice the dough in two and shape into two loaves. I don’t knead, just separate and shape. Allow to rise the second time. It’s ready for the oven when you gently press on the firm dough and it recovers slowly.

Make a slice down the center of the loaf (two slices if you’re making a round loaf) and spritz it with water. The slice and the water allow the dough to rise easily, forming nice pockets. If the crust starts to dry out, spritz it again.

It’s conveniently chilly and damp today so the wood stove is going this afternoon. I’m breaking my slow rise rule and put my bread on the clothes rack in the warm living room to rise quickly.

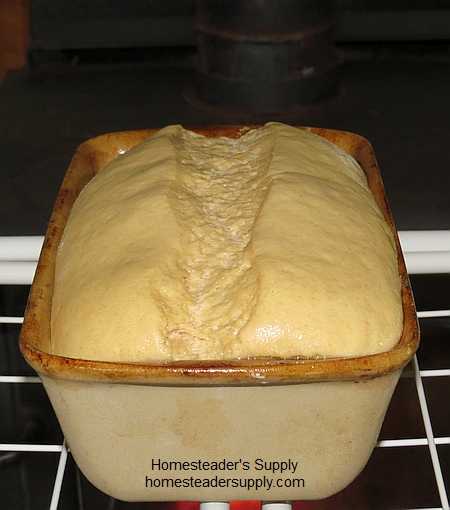
Sourdough rising

Sourdough rising. This is almost high enough for the size loaf I’m after.

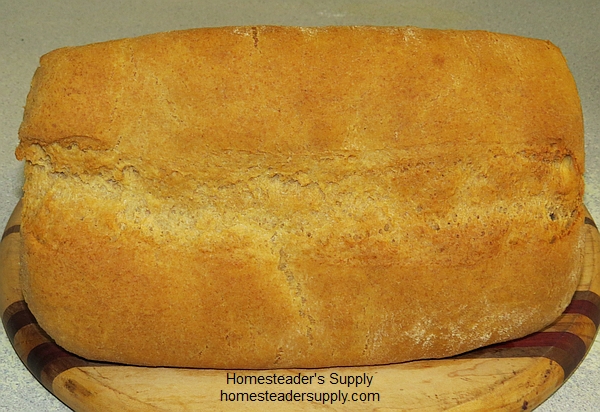
Sourdough bread bakedWhile the dough is rising I mixed up another batch of starter. I use the same jar or scrape the last tablespoon or two of starter from it and add it to a new jar. The only time I don’t have starter in the jar is on the original batch. Notice how much lighter in color this new batch is compared to the one above. As it ages and develops it becomes darker. This jar sits in a cool spot in the kitchen. I don’t tend to it daily. Tomorrow morning it will be at the top of jar. I’ll stir it down if necessary but otherwise it’s on its own until I use it in a day or two.

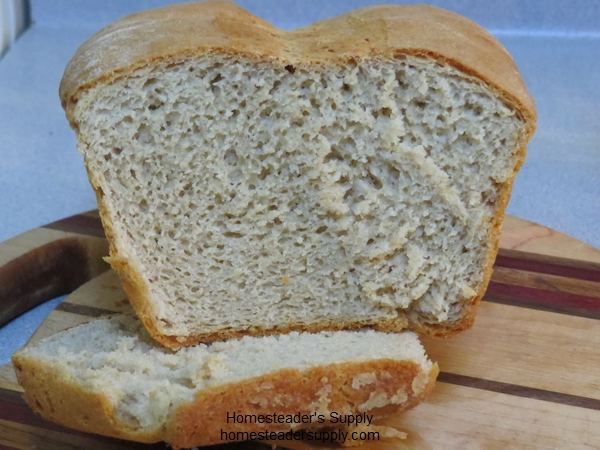
Sourdough bread

Cream Cheese Recipe

Homemade Cream Cheese

There’s nothing like homemade cream cheese. You’ll be pleasantly surprised by the difference, especially if you follow this homemade cream cheese recipe.

  • Place cream from milk into quart jar. If you’re using store bought cream you should use one pint.
  • Add 1/16 tsp Mesophilic culture and stir well.
  • Cover the jar and leave on the counter at room temperature for 12 to24 hrs, or until cream is thick just like sour cream, in fact when it is ready, this thicken cream IS sour cream!
  • Place cheesecloth over colander that is sitting inside large bowl or pot.
  • Remove the thick sour cream from the quart jar right into the cheesecloth. Wrap up the cheesecloth and either hang freely to drain the whey and butter milk from the sour cream.
  • The longer is drains the dryer the cheese will be. Allow approx 8 to 12 hours of drying time.
  • Remove cream cheese from the cheese cloth and add spices, herbs, natural sweeteners to your taste preference.

Farmhouse Cheddar Cheese Recipe

Farmhouse Cheddar Cheese Recipe

For convenience you may send this recipe to the printer and pick it up on your way to the kitchen. Download the recipe in a pdf file.

3 gallons whole milk

Mesophilic Culture (1/4 tsp Abiasa, 1/8 tsp Danisco, or 1/16 tsp Sacco)

2 teaspoons calcium chloride (only needed for store bought milk)
1.5 tablet rennet or 3/4 tsp liquid rennet
1/4 cup unchlorinated water
1 Tbsp salt

  • Combine milk, (calcium chloride) in 16 qt stock pot (double boiler to prevent scorching)
  • Slowly heat mixture to 86 degrees. Turn off heat and stir in lactic cheese culture. (Different types of culture create different flavors of cheese)  Stir gently throughout. Cover mixture and allow to rest undisturbed at 86 degrees for 45 minutes.
  • Dissolve rennet tablet or liquid rennet in 1/4 cup  water.
  • Keep the milk at 86 degrees.  Stir the rennet mixture into milk slowly but thoroughly. Allow milk to set undisturbed for 30 – 45 minutes or until curd shows a clean break.
  • Using long knife, cut the curds into 1/2 inch squares, then stir gently just to break the strips of curds into chunks. Let it sit to rest for 5 minutes.
  • Slowly heat the curds and whey to 102 degrees, raising the temperature 2 degrees every 5 minutes. Stir curd gently to prevent matting and reduce their size to half peanut size. A large whisk works well by placing it to bottom of pot and putting up right so curds break as they fall through the wisk. Hold curds for additional 30 minutes at this temperature
  • Place pre-warmed with hot water colander over a pot and pour the curds into it.
  • Reserve 1/3 of the whey and pour back into the cheese pot. Set colander of curds onto the cheese pot. Cover top with cheese cloth and lid to keep in warmth. Allow curds to drain for 45 to 60 minutes. This is called the cheddaring process.
  • Cut slab into pieces and press through french fry cutter or cut by hand.
  • Add 1 tablespoon course salt. Using your hands, gently mix the salt into curds. You can eat these curds now, or press into a wheel.
  • Place the curds into cheese press and follow the directions for dressing with cheese cloth for the next 12 hours.
  • Remove cheese from press, unwrap the cloth, place cheese on drying mat to air dry for 12 hours, creating a nice skin over the whole cheese.  Cheese is ready to slice and eat or you can wax and age for stronger cheddar flavor.
  • Mix 1 tablespoon of salt with 1/2 cup of water. Use a corner of the cheese cloth to lightly apply a saltwater wash to the cheese.

Cottage Cheese Recipe

Cottage Cheese Recipe

1 Gallon Cow, Goat or Sheep Milk
Mesophilic Cheese Culture
Rennet
salt

  • Gently warm the milk to 70 degrees F in a warm water bath.
  • Add: 3/8 tsp Abiasa culture, or
  • 1/8 tsp Danisco Culture, or 1/16 tsp Sacco Italian Culture
  • Let the culture dissolve on the milk surface for 2-4 minutes before stirring. Work well into the milk using the 20 top/bottom strokes.
  • Add: 1/4 tsp liquid rennet diluted in 1/4 cup of cool water, or
  • 1/2 tab vegetarian rennet diluted in 1/4 cup cool water for 20 minutes prior to use

Mix thoroughly.

When a firm curd forms from sitting at room temperature, cut the curd mass with a knife into 1/2 inch cubes and stir gently for 2-5 minutes.

Cook the curds and whey slowly to 102 degrees F in a double boiler pot system while stirring frequently to break up the curds. Using a large wire wisk makes this process so easy… just place wish into the pot and pull up through the curds. Try to raise the temperature 5 degrees F every five minutes taking 45-60 minutes to reach your final cook temperature.

Once the curds appear firm and springy and are approximately the size of a shelled peanut, drain through a clean cheese cloth.

Rinse the curds in very cold water, allow them to drain completely then add salt to taste. Remember that salt is also a preservative, helping to prevent mold formation and prolong the shelf life of your cheese. You may enrich the curds with heavy cream or pack as dry curd into storage tubs and refrigerate.

The products will have approximately 10-14 days of shelf life.

Amazing Homemade Bread

Simple No Knead Homemade Bread Recipe

Simple No Knead Homemade Bread Recipe


A few years ago I found this recipe in an issue of Mother Earth News and have been hooked ever since. I’m not a big fan of sour breads, so I make it the day I want to bake it, but if you like sour bread, you can let it ripen in the refrigerator for a few days and you’ll have that nice sour bite. The recipe is so simple…

Homemade No Knead Bread

A simple recipe for homemade no knead bread

3 cups luke warm water
1 1/2 tablespoon yeast
1 1/2 tablespoon salt
6 1/2 cup flour

Put away the ol’ Kitchen Aid because this is a NO KNEAD bread!!!! Mix all ingredients thoroughly and let rise for 2 hours. Once risen, punch down and refrigerate until one half hour before your ready to bake. At baking time, preheat the oven to 450 degrees. Pull out the dough onto your lightly floured counter, form into two loaves. Sprinkle corn meal onto a large baking sheet and then place your loaves onto the sheet. With a sharp knife, make some slits into the top of your loaves and let rise for 20 minutes.

Before placing your loaves in the oven, place another pan beneath the rack that your bread will bake on. I use a 9×9 pan and fill it about half way with water. Slide your cookie sheet onto the rack above and set the timer for 30 minutes. Your loaves should be a nice golden brown and firm to the touch when ready. I brush the loaves with butter just after I pull them from the oven to soften up the crust a bit.

Here’s the link to the entire article if you’d like to see all the fun they have with this dough!

I wanted to share this with you because I’m baking it today myself… it goes great with a ham and lentil soup!