Tag Archives: compost

Composting yard waste will feed your garden’s soil

Composting Yard Waste

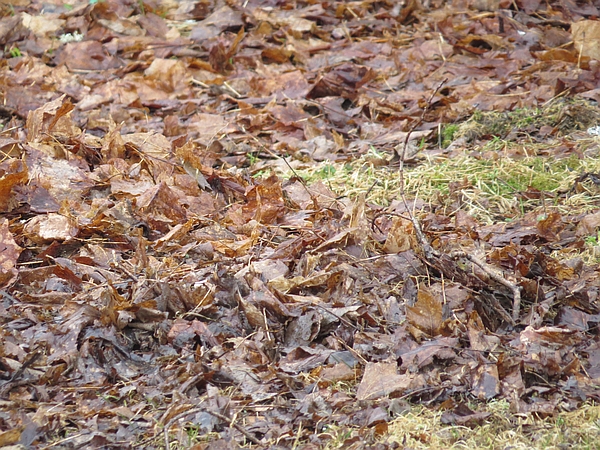
I don’t know how there got to be so many leaves on the lawn this spring. I raked in the fall, added the leaves to the garden and rototilled them into the soil to give them the winter to break down. I’m sure the trees were bare when I crossed this task off the to do list. I must have become distracted by bird and deer hunting seasons and stopped paying attention to the lawn. Now I’m composting yard waste I thought I’d taken care of six months ago.

composting yard waste

I swear I raked leaves last fall!

Composting yard waste in the spring is easy, especially if you have manure to add to the leaves and dead grass you’ve raked up. Racking the yard and cleaning the hen house on the same day will leave you with stronger muscles and a great compost pile! Choose a spot in a shaded area. You want the pile to get hot so it breaks down and kills weed seeds and other undesirables but not so hot that it kills everything.

You’ll need to decide a head of time how you’ll be composting yard waste. I don’t have a single favorite method. The plastic plastic bin or circle made of chicken wire is convenient, especially when I have a small amount of composting ingredients.When it’s time to turn the compost you pick up the bin (it’s bottomless), set it down beside the pile, and move the composting materials into the bin.

A three bin system is most useful when you have a lot to compost. You fill the first and second bin. When it’s time to turn the compost you move bin two into bin three, and bin one into the now empty bin two. When it’s time to turn again, bin two goes back into one and three into two.

When you need to start a new compost pile you move the pile that needs to be turned into an end bin and build the new pile in the center bin. Don’t add to the pile that’s composting. When that happens you’ll have uncomposted material in your otherwise finished pile.

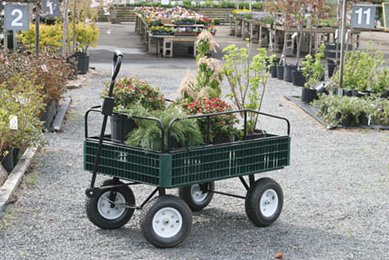
garden wagon

Crate Garden Wagon

Gather up the twigs and anything else you can’t run over with the lawn mower. Set aside the twigs. Remove dog waste as that’s not suitable for a compost pile. Run over the leaves to chop them up. Whole, wet leaves mat together and can create a mess in a compost bin.

Tip: If you start mowing on the outside of the area and mow your way in, always blowing the leaves and grass to the center, you will save yourself a considerable amount of time raking.

After filling your garden cart or wheelbarrow, place your rake on top of the pile to help keep the debris in place.

How to Build a Compost Pile

You’ll start composting yard waste now as you build your pile. Place the twigs on the bottom of the pile to allow air to flow in and water to drain out. If you have cornstalks and sunflower stalks you can use them in the base.

Shovel a five to six inch layer of chopped leaves on top of the twigs and stalks.
Add a two to three inch layer of manure, kitchen scraps or grass.
Sprinkle a shovelful of garden soil on top of the manure.
Add water until the ingredients are damp like a wrung out sponge but not dripping wet.
Continue until the bin is full or the pile is a minimum of three feet by three feet. The ingredients will condense and shrink overnight. You may add more layers the next day.

Tip: Healthy garden soil is full of the microbes that help the compost pile start “cooking.”

You need to watch the pile to be sure it reaches 135° to 160°. A compost thermometer is a big help. You poke it into the pile and check the temperature without reaching in. When the pile cools down you’ll need to turn or disturb the pile, about once a week. You can completely turn the pile by moving it as described above, or you might need to just add air and a little water. You can “fluff” the pile with a garden fork.

Joining in on Homestead Blog Hop #29!


Vermicomposting with Worm Factory

Vermicomposting with Worm Factory

Peelings, cores, pea pods, junk mail, leaves – composting worms thrive on your scraps. Vermicomposting with Worm Factory is simple, takes up little space and is odor free. According to the Environmental Protection Agency, Americans send 34 million tons of food waste to  landfills every year. More food is put into our water system and that then has to be cleaned out when food is put down the garbage disposal. That’s a lot of wasted food and a lot of unnecessary waste placed in our landfills and water. We can cut down drastically on what we waste with a little thought, and compost what’s left. “Waste” becomes compost with minimal effort on our part and becomes useful. Your plants with thank you with higher production when you incorporate worm castings into your garden and potting soil. Worm castings tea is a terrific fertilizer and can be used as a foliar spray. Your houseplants will thrive, too. I’ve found a few worms in my houseplants’ pots a year after re-potting. They contribute to keeping the potting soil healthy.

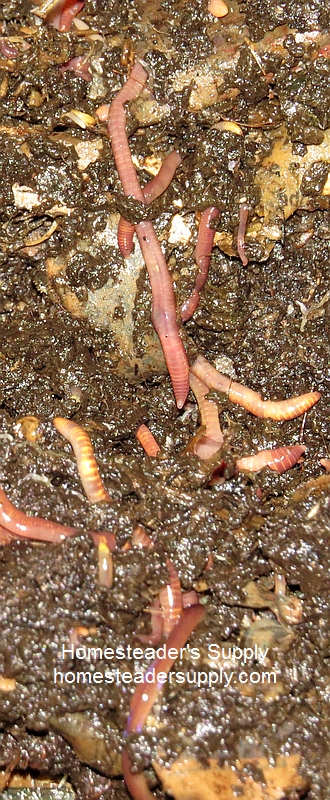
Red wigglers (Eisenia fetida)

Red wigglers (Eisenia fetida)

We’ve been using the Worm Factory 360 for six months. With three full trays of compost so far and a fourth near completion, we’re very happy with this system. It was easy to set up and takes only a couple of minutes a day to tend the worms. You shouldn’t feed your worms dairy, meat and citrus, and we recommend avoiding grass. Grass mats together, heats up quickly, and causes the worms to try to escape, or die.

Each Worm Factory comes with an instructional DVD, bedding and a scraper. The Quick Tips on the lid tells you what you can and can’t feed to your works, and how to manage the bin. It took about an hour to get it set up and add red wigglers (Eisenia fetida), the species of worms most often used for vermicomposting.

Leachate, the liquid produced by the worms and food, collects in the bottom tray. It is drawn off through the spigot to be used as fertilizer.

We have four Worm Factory setups on sale. You have a choice of three or four trays and three colors. You’ll want to choose the unit you need according to the amount of food you have to feed the worms. Red wigglers will adjust their reproduction up and down according to the amount of available food. If you have an excess of worms they can be used for fishing, fed to poultry and shared with friends. Even my goldfish get a few worms now and then. The Worm Factory 360 holds up to 12,000 worms. It’s perfect for a large family, people who cook from scratch (lots of peels, carrot tops and other whole food scraps).

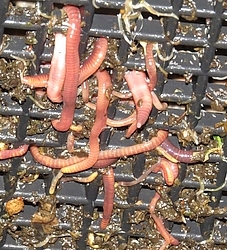
Red wigglers migrate between trays.

Red wigglers migrate between trays.

If you’re leaving on vacation you give your worms a little extra food and forget about them. They’ll survive two weeks after their food supply disappears. They’re just that simple.

The worms shown in this photo are migrating between trays. They’ve almost finished off the food in the bottom. A few return to the bottom tray but most have moved to the top. You can see worms in various sizes. They’re reproducing well.

Worm Factory with 3 Trays


We offer four Worm Factory setups and they’re currently on sale. Shipping is free to the lower 48 states. For other areas, give Jerri a call and she’ll get the shipping costs for you. (928) 583-0254. Or, fill out the contact form with your shipping address and number of Work Factories you’ll order and we’ll get back to you.

The Worm Factory is made in USA and has a 10 year warranty on parts and manufacturing.


You can choose between: