Question Why does cheese wax come in different colors?
Tag Archives: cheese
Ultimate Cheese Press Instructional Video
The Ultimate Cheese Press and More!
Wardee from GNOWFGLINS shows us how to use The Ultimate Cheese Press step by step. It’s very simple and seeing it in action lets us know we’re doing it just right.
You’ll find supplies you need to make cheese on our website. Calcium chloride and lipase are here. Cheesecloth and muslin. We have a great variety of cultures.
Do you need drying racks, funnels and other cheese making tools? We have two cheese making books. And kits. We have great cheese making kits.
And there’s more! You’ll find more cheese making supplies here.
Cheese Recipes
We’re proud of our American made products. Made in the USA, they keep our dollars in not just our country but in our communities.
Cream Cheese Recipe
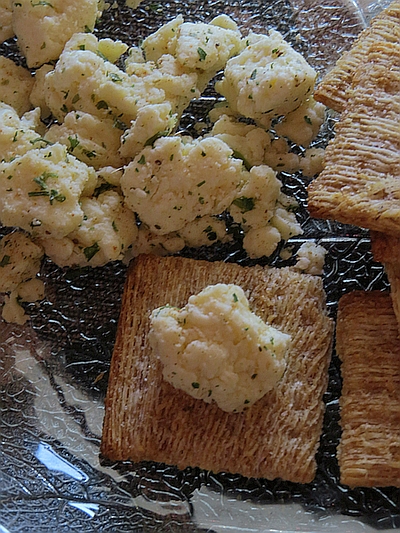
Homemade Cream Cheese
There’s nothing like homemade cream cheese. You’ll be pleasantly surprised by the difference, especially if you follow this homemade cream cheese recipe.
- Place cream from milk into quart jar. If you’re using store bought cream you should use one pint.
- Add 1/16 tsp Mesophilic culture and stir well.
- Cover the jar and leave on the counter at room temperature for 12 to24 hrs, or until cream is thick just like sour cream, in fact when it is ready, this thicken cream IS sour cream!
- Place cheesecloth over colander that is sitting inside large bowl or pot.
- Remove the thick sour cream from the quart jar right into the cheesecloth. Wrap up the cheesecloth and either hang freely to drain the whey and butter milk from the sour cream.
- The longer is drains the dryer the cheese will be. Allow approx 8 to 12 hours of drying time.
- Remove cream cheese from the cheese cloth and add spices, herbs, natural sweeteners to your taste preference.
Farmhouse Cheddar Cheese Recipe
Farmhouse Cheddar Cheese Recipe
For convenience you may send this recipe to the printer and pick it up on your way to the kitchen. Download the recipe in a pdf file.
3 gallons whole milk
Mesophilic Culture (1/4 tsp Abiasa, 1/8 tsp Danisco, or 1/16 tsp Sacco)
2 teaspoons calcium chloride (only needed for store bought milk)
1.5 tablet rennet or 3/4 tsp liquid rennet
1/4 cup unchlorinated water
1 Tbsp salt
- Combine milk, (calcium chloride) in 16 qt stock pot (double boiler to prevent scorching)
- Slowly heat mixture to 86 degrees. Turn off heat and stir in lactic cheese culture. (Different types of culture create different flavors of cheese) Stir gently throughout. Cover mixture and allow to rest undisturbed at 86 degrees for 45 minutes.
- Dissolve rennet tablet or liquid rennet in 1/4 cup water.
- Keep the milk at 86 degrees. Stir the rennet mixture into milk slowly but thoroughly. Allow milk to set undisturbed for 30 – 45 minutes or until curd shows a clean break.
- Using long knife, cut the curds into 1/2 inch squares, then stir gently just to break the strips of curds into chunks. Let it sit to rest for 5 minutes.
- Slowly heat the curds and whey to 102 degrees, raising the temperature 2 degrees every 5 minutes. Stir curd gently to prevent matting and reduce their size to half peanut size. A large whisk works well by placing it to bottom of pot and putting up right so curds break as they fall through the wisk. Hold curds for additional 30 minutes at this temperature
- Place pre-warmed with hot water colander over a pot and pour the curds into it.
- Reserve 1/3 of the whey and pour back into the cheese pot. Set colander of curds onto the cheese pot. Cover top with cheese cloth and lid to keep in warmth. Allow curds to drain for 45 to 60 minutes. This is called the cheddaring process.
- Cut slab into pieces and press through french fry cutter or cut by hand.
- Add 1 tablespoon course salt. Using your hands, gently mix the salt into curds. You can eat these curds now, or press into a wheel.
- Place the curds into cheese press and follow the directions for dressing with cheese cloth for the next 12 hours.
- Remove cheese from press, unwrap the cloth, place cheese on drying mat to air dry for 12 hours, creating a nice skin over the whole cheese. Cheese is ready to slice and eat or you can wax and age for stronger cheddar flavor.
- Mix 1 tablespoon of salt with 1/2 cup of water. Use a corner of the cheese cloth to lightly apply a saltwater wash to the cheese.
Best Basic Cheese Kit – Let’s Make Cheese!
I’ve dabbled in a little cheese making in the past – just enough to know I want to make more, and I want it to be delicious. I love really good cheese. Jerri Bedell, our beloved owner of Homesteader’s Supply, sent the Best Basic Cheese Kit to me to try out. You see…I have an idea. I think we should make cheese together. All of us! Well not all of us. Of course not everyone wants to make cheese. But how about some of us?
Here’s my plan. On Tuesday, May 13, I’m going to make cheese using the Best Basic Cheese Kit. There’s time for you to order the kit, get familiar with it, and be ready to make cheese that day. We’ll compare notes as we go and talk about the cheese we made. If you write about this in your blog we’ll share your link on Facebook, Twitter and in a blog about our cheese making day.
The cheese kit is only $44.88, and shipping is free in the lower 48 states.
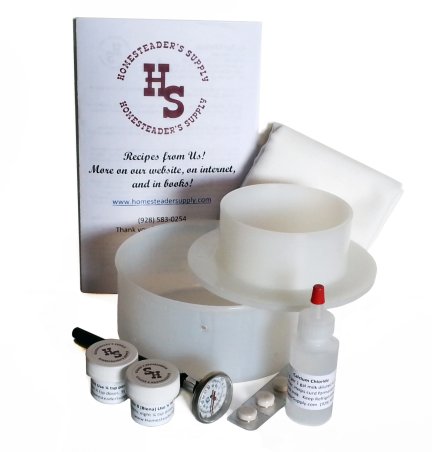
Best Basic Cheese Kit
So about that cheese kit! This is the same supplies and equipment used by professionals to make cheese. It contains some of the same quality products in our larger kits, just gives you the basic products you need to try your hand at making all kinds of cheese. And what better than to buy your kit from a store that takes pride in helping our customers!
Our kit does not contain any citric acid or vinegar, and there is no need for a microwave. Let’s face it, real cheese takes time to make…some faster than others. But if you want the best tasting, all natural cheese, then this is the kit for you.
With this kit you will be able to make many types of cheese, as it includes both basic mesophilic and thermophilic cultures, enough to make up to 24 lbs of cheese from each type. And, these cultures are the only type where you can make a mother culture for continued use, so they can last you a very long time. We include that recipe. The Reblochon Mold is the best one to use as a form for soft cheeses and mozzarella, and as a press for harder cheeses like Colby and Cheddar, making one pound of cheese from one gallon of milk! The rennet is vegetarian, and usually only needs 1/4 or 1/2 half tablet per gallon of milk. The calcium chloride is for making cheese with pasteurized milk, necessary to help for the curds. And the bonus is you can even make butter and sour cream with this kit!
Everything that is included in this kit and more information about the kit is available on our website. Please let us know that you’ve ordered one of our cheese kits (doesn’t have to be this one in particular!) and will be making cheese with us. We’d like to blog about the project, include your photos and comments, and if you have one, link to your blog. You may comment here, leave a message on Facebook or send Robin an email.
The Ultimate Cheese Press
Now that the birthing and milking seasons are in full swing there’s an abundance of milk. It’s time to make cheese!
Our cheese press is made for home cheese makers, designed and manufactured by Homesteaders Supply right here in the USA! Homesteader’s Supply carries cheese making supplies. We suggest starting with our kits and replenishing as you go.
Made from a beautiful grained hard maple, with a lighter basic color with various shades of darker marbling. Each press is as unique as the wood it’s made from. It comes with an innovative design that makes pressing cheese easy, and they all come out the same. No need for pressure gauges, no lopsided cheeses… every one comes out great! And this press will probably last you a lifetime with proper care!
Raw presses will be readily available soon. They are not oiled! You can choose the oil you’d like to use. Organic coconut oil works very well. We’ll make an announcement when the raw presses are in here in the blog, on Facebook and Twitter.
Some of the features of the Ultimate Cheese Press:
- Perfect to make all types of hard and semi-hard cheeses.
- Ergonomically designed handles and followers to reduce the stress to your hands and fingers.
- Comes with 2 hoops, now larger and taller than other presses, to prepare a 1 lb to 5 lb cheese!
- Designed to accept the hoops in perfect position every time!
- Hoops are made of food grade heavy duty water pipe. Professional cheese makers prefer this type of hoop over the metal hoop type, as it won’t cause too fast of cooling the cheese during pressing time as stainless steel does.
- Made with all food grade materials, will last a very long time, sturdy hardwood with heavy-duty stainless steel fasteners.
- Easy to use; small enough to just place it into baking pan to allow for draining… therefore no mess, no fuss…
- Finished wood with Canola Oil with no odor, no petro-chemicals, natural for food contact, makes the wood water proof, and all you need to do is reapply a very small amount of your own oil of choice when it appears dry.
- We use real wood, not plastic. Latest research confirms that wood inhibits bacterial growth, which is not the case for plastics such as melamine. Now you know why everyone is going back to butcher block cutting boards!
- No need for gauge… as you just turn to tighten as whey is released. So Simple! Easy to Clean! Just can’t say enough about this press… it’s the best!
- With proper care, this cheese press should last a lifetime! (soap and water, no dishwasher!)
- Dimensions: Base approx 7″ X 7″, Unit Height 11″, Large Mold 7″ tall, 6 1/2″ Diameter; Small Mold 7″ tall, 4 1/2″ diameter.
Wardeh Harmon, owner of GNOWFGLINS (visit the website – you’ll love it!) demonstrates the use of The Ultimate Cheese Press. You’ll see how simple this cheese press is to use in the video.
We’re proud to have designed this press and to have it manufactured right here in the United States. It’s a beautiful, functional, easy to use press that’s great for hard and semi-hard cheeses.


