Preparing For A New Winter!

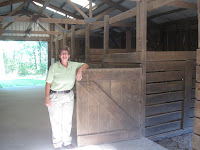
The trees are turning, revealing amazing fall colors of reds, yellows, pinks, oranges and browns… the garden survived the first frost and is winding down production. We built up the box stalls in the barn to ensure that the cow and horse had a warm and dry place to bed down at night. The days of fall are getting colder and shorter.
We’ve been in Wisconsin for about three months now and it’s already time to start planning for the coming winter months. We talked about what it is we’ll need to get done before winter and I realized, as the discussion went on, how different the climate in Wisconsin will be from that of Arizona. In Arizona, we’d get snow… sometimes at least a foot in a good overnight storm, but it would typically melt off in a day or so and while it was cool outside, it was rarely bitter cold. I am thinking that those mild winter days are behind me with the move to Wisconsin! So, today’s blog will toss around our winter planning ideas and I would encourage hearing from all of you on how you’re planning for your winter months.

130 bales of 2 string hay plus the loose pile

First item on our list was to ensure a good food supply for Do and Cookie cow. We did end up finding a great resource for hay. We purchased about 100 bales of Alf-Alfa and about 30 bales of grass hay.We hadn’t been here long enough to find a resource for used pallets… so for this year we used two 12′ x 5′ corral panels as an air gap beneath the pile. I am hoping it is enough to keep it from molding. So far, the bales we’ve fed have been lush and green with zero mold smell or evidence of too much moisture. We did stack this in the corner of the 30 x 60 pole barn / garage. One thing completed on our list!!
Today’s big task is to go through the barn and garage to pull out anything that can’t tolerate freezing temperatures! I use Espree Aloe Herbal Fly Repellent on the cow and horse… this doesn’t tolerate freezing well so I’ve made a livestock shelf in the basement for this and other items I’ll pull from the tack room. Ivomec, Blu Kote, etc… Really, any liquid items in your tack room should be pulled for the winter months to avoid container splitting or reducing the effectiveness of the product.
Tack was another question that popped into my mind, though from what I’ve read on many forums, a good oiling in the fall and covering your tack will keep it safe from damage through the cold months.

Heated auto fill  water source

Water sources for Cookie and Do are another consideration for the Wisconsin winters. We have a heated water source. It’s an auto fill, tied directly to the well, and has a heater inside the housing to keep the water from freezing. While I am comfortable with this, and love that it has access from front and back (though not visible in the picture)… I’m thinking I want a back up water source in the barn. In Arizona, I used  a large metal garbage can that I purchased specifically for a back up water source. I put a large rock in the bottom and set a submersible heating element on top of the rock. I used the rock just to create a larger heat source. We had temperatures in AZ that would dip to -9 degrees and this stayed at 40 degrees. As long as I can make sure that the furry kids have access to water, I’m happy!!!
So, in summary… the furry kids have a warm place to sleep for winter… plenty of food…. and a good water source. All items that can freeze have been removed from the tack room and into the heated basement. Tack has been oiled and covered for protection. Have I missed anything that you can think of???
Happy Homesteading and I hope you all are enjoying the hot cider and amazing fall colors!!!

Nance

Barn Stalls Update… and a Give Away!

Sand… Sand… and more Sand!!!! Ok, if you ever have the notion to buy 13 yards of sand… DON’T DO IT!!!! So, now that I didn’t get that advice in time… we have 13 yards of sand to deal with!! I ordered it to fill in the box stalls in the barn. They are dirt floor and after many years of poop scooping the stalls were about 8″ too shallow and a bit bowl shaped. After adding about 3 yards of sand to the first box stall, we found the flooring to be too shifty… Cookie and Do’s hooves sunk in the sand and Do seemed to be a bit unsteady on his feet. We needed to add something to the sand to keep it from shifting beneath the hooves. We pulled up the stall mats and raked the stall level and smooth again. After many chats with others who own livestock, we decided to go with the advice to add shavings to the sand to help firm it up and create a stall floor that they can bed down in this winter and will wick away moisture.
Once it was all raked smooth, we added three bags of shavings and it did make an immediate difference! The horse walked in and his hooves were solid on the shavings and didn’t sink down into the sand! All was wonderful… UNTIL.. the cow came in… I will post a few photos below to give you an idea of the happy cow dance… Seriously, she made a mess, but didn’t hurt the added stability of the floor with the shavings mixed into the sand. We have since added the sand foundation to two more stalls and just have to add the shavings . Keep reading after the pictures for some give away fun…

Here is Cookie diving into the shavings… notice the horse looking over like “What the HELL!!!”

Now, she’s really blending the shavings into the sand… and the horse with bad fetlocks is staying way out of the way!!!!

So, as you can see… the cow loves the changes to the stall!!! While we continue working on the barn we need a bit of help from you… WHAT ARE WE GOING TO DO WITH ALL THE EXTRA SAND????????????????

Some ideas we have… fill sand bags and put them on a pallet. We can load them in the back of the truck for weight this winter and traction should we get stuck in the snow… actually, we’ll put some in each of the three vehicles..

Other idea provided by my son Matt… HORSE SHOE PITS!!! so now we are trying to figure out a location for those…

As for the give away… I have a 3 pack of Pickle Pro lids for the best suggestion on what else we can do with the sand. We only have about 6 yards left – maybe 5 by the time we fill sand bags…

I look forward to reading the many ideas and suggestions!

Happy Homesteading from the great state of Wisconsin!!!!

Got Sand???? Why Yes… Maybe Too Much!!

Another episode from the new homestead in Wisconsin…

We had 13 yards of sand delivered yesterday. I had no idea how much 13 yards of sand was and as I sat waiting for the truck to arrive, I silently hoped I had enough! Now I know that 13 yards is a dump truck load of sand and quite honestly… way too much!

So, once the load of sand was dumped… we began moving wheel barrow load upon wheel barrow load into one of the box stalls. The stall was way too low and needed built up. I thought we were getting a mix of soil and sand, which would have packed down nicely… but we got beautiful volleyball court sugar sand… and A LOT OF IT! We moved and raked many yards of sand into the stall and it built up nicely… until the horse and the cow walked in… Now, I find myself out there raking the deep hoof marks flat and wonder if I haven’t made the first mistake on our new homestead.

Perhaps sand wasn’t the best choice… now that we have enough to create an Olympic size volley ball court! It packs down well enough beneath rubber mats, but the moment hooves touch the bare sand (without a mat), there are big dig marks in it and the horse seems unsteady. (He had bad fetlocks) We are leaning towards digging about half out of the stall and putting shavings on top of the sand.

I sat down and researched it a bit tonight and realized how rash of a decision I made. I called for top soil and woman I spoke to shared that many use sand to build up box stalls for horses. I planned on putting rubber mats down where the horse eats… and we feed hay outside… so while I wondered about sand colic, it wasn’t my biggest concern. My concern is that the cow and horse sink in the sand much like the wheel barrow does in the picture above.

Have any of you used sand to build up a box stall? I figure we moved enough sand to build it up about 8 inches… maybe I should have done it in stages? It was damp when when moved it into the stall… as it dries I find that it is FINE FINE FINE sand. I’m really thinking we need to dig about half of it out and move that to the other big box stall and then put pine shavings on top of the sand.

Ok, what are your thoughts?? I had great feedback on the pasture blog and I’m working pulling the big weeds and mowing the rest down for a reseeding this winter/spring. Now… I’m looking to all of you to see what you think I should do with this sandy mess I’ve made for myself… and if I dig it out… any suggestions on what to do with the 13 yards of sand??? HAHAHA… If you look at the pictures below, you can see the depth the hooves sink into the sand. Maybe I am worrying about nothing and it will all work out well. I’ve read about how sand dries out the hooves too… so much I should have considered before delivery!!

By the way – we will be filling up some sand bags for weight in the back of my truck when it snows this coming winter!!!

Any and all thoughts are welcome… and as always… Happy Homesteading!!!!

Creating a Healthy Pasture for Livestock

Now that we are getting unpacked and finding time to walk the property, we’re seeing the weed growth that has taken hold in the two pastures here on the new homestead. Weeds have taken over where nice grasses once lived and I find myself seeing the need to lay the groundwork now for a healthy pasture this fall and into next spring.

The horse is still on the skinny side from the move across the country and then moving from the boarding place to the forever homestead. We find the need to feed him hay from our newly purchased winter hay stash and it’s only September. While we know we’ll be needed to call the hay guy for another hundred bales or so… we are also looking ahead to see what will need to be done for next spring to get the pastures healthy enough to support livestock next year. So many questions arise! Do we rent a tractor and till up the land and plant fresh for next year or do we seed right on top of what’s there and see what takes root?

Much of the arena is sand based and is in need of top soil if it will host alf alfa or clover. The horse loves to stay in the soft sandy areas because of his dropped fetlocks and the cushion it seems to provide his hooves. The larger area is very wooded and has a lot of fallen branches to clean up, as well as some trees that need to come down so sunlight can reach the seeds and encourage growth. I know that all of this will take time and much planning, yet being a typical modern day American… I want it all done NOW!!! hahaha…

I am resisting the urge to just go in there and til it all under… my concern is that the soil that is there will run off with a good rain due to the sloping nature of our parcel. I’m leaning toward taking our time and pulling the large weeds that have grown into the fence line as well as the weeds that have crowded out the grass in certain areas. Perhaps with that done, we’ll be able to germinate some seeds this coming spring and begin the process of creating a healthy pasture for Cookie cow and Do the horse.

Any thoughts and ideas are welcome!!!! Happy Homesteading!!

Meals – Ready – Eat… just add water…

Good morning folks!

Homesteader’s are all about being prepared. We spend summer tending the garden so we can can and preserve food supplies for winter. We make cheese to preserve the milk in a form that better stores. We stock the freezer with beef, pork and / or chicken… rabbit, deer and elk too for that matter… so we have meat supplies to last year around. For those who don’t homestead or for those who do homestead and would also like something extra in the pantry for a “just in case” moment, we have found freeze dried food kits to carry on the site.

The meals are freeze dried for a long term shelf life and are available in different durations of shelf life. Some of the meals are designed for a long camping or back packing trip, while others are designed for long term shelf life in the event of a crisis situation where supplies would be scarce. We have divided the ‘Ready eat Food Kits‘ up into Long Term Food Kits, Grab and Go Food Kits and Outdoor Life Food Kits.

The long term pouches will store for 25 years! Those with meat in the pouch have a much shorter life of 7 years. I won’t go into the process so much with this blog. Instead, I’d like to cover reviews of the taste. Jerri had the vendor send her some samples and she had them for dinner for several evenings. (I haven’t had a chance to try them yet, but I’m hoping to very soon). According to Jerri, they actually taste quite good! She was very surprised at the flavor and how easy it was to just add boiling water, wait the appropriate time and then dinner was served.

All in all , in the event of a long term power outage, a snow storm that locks you in for several days or events similar to those of Hurricane Katrina… these handy little pouches will ensure you’re able to eat when there is no access to food supplies.

I sincerely hope none of us ever need these supplies, though I certainly understand the need to be prepared. If we were to lose power long term, I’d be inclined to keep the freezer closed and try to keep the meat frozen for as long as possible!

Happy Homesteading!

Turning the New House into a Homestead!

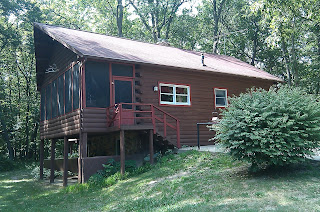
new homestead
I apologize for the time since my last blog… We have been trying to unpack and get settled here on the new homestead. While walking the property, talking about what to do to turn this little hobby farm into a working homestead, I had the idea to invite all of you to share the journey with us. So, with that thought in mind, here is our first installment of “Turning your new home into a working homestead”.

new homesteadMoving from Arizona to Wisconsin was quite an adventure. I am happy to share that we are all finally on one parcel of land. Cookie and Do were delivered last Sunday from the boarding facility and the big rig truck has been completely unloaded. While we moved from Arizona to Wisconsin with the desire of getting back to the moisture and green of the Midwest, we were quite surprised with the subtle differences between the two states…

Climate aside, there are a few differences that take a bit of getting used to. Now, I’m sure that had we arrived in any other year I wouldn’t have noticed quite so many differences so soon, but being as the “worse drought since the 50’s” was in full swing when we arrived, the difference jumped out right off the bat.

In Arizona, we shopped at one of two local feed stores for hay, C.O.B. (Corn, Oats and Barley with Molasses) and these nifty alfalfa pellets called Estralla. Cookie and Do survived the desert living off this diet for their entire life! Arriving in Wisconsin with brown pastures and no rain in sight, I set out to find a feed store… and was shocked when I couldn’t really find one! No one sold hay! Farm and Fleet sold a sweet feed but it was pelleted – not whole grains and NO ONE carries Estralla pellets out here.new homestead They were designed for the southwest apparently! Who knew???!!! We ended up buying the sweet feed in pelleted form and found alfalfa hay cubes that were shipped in from Canada. The horse lost some weight, but we kept them going until the rains came back and the pastures greened up. I’m sure that when I am able to experience a normal Wisconsin summer, I too will scoff at the notion of a feed store in the Midwest, but right now… I’m longing for my Olsen’s Grain in Chino Valley, AZ!!!

Other differences… the grocery stores are so incredibly different. We had to dry up Cookie cow for the trip and left much of the condiments in AZ with friends. The grocery stores out here are TINY and a bit specialized. While this is fun and an adventure each time we go shopping, it’s also difficult because several stores become involved to accomplish an entire grocery list. We did find a large Safeway type grocery store in Middleton and will likely do most of our shopping there for the non-homestead created essentials.

Complete side note….. While I am all about the homestead and growing / raising our own food… I have to confess that there is this cheese spread called Owl’s Nest Port Wine Cheese that has me completely addicted!!!! It’s now my favorite after work snack with some salty butter pretzels!!!

Another very fun difference… you can buy fishing worms… live bait… booze and sub sandwiches from the same store!!!! The one closest to us claims “LIVE BAIT AND LIQUOR!!!” ahead one mile on a sign!!! I went into the store just to check it out… and found it to be quite a neat little country store!

new homesteadThough, despite the differences, I wouldn’t change a thing! I am LOVING the Midwest and now that we are starting to find sources for a winter stock pile of hay… I am feeling secure for Cookie and Do too!

Hope you enjoy the new homestead adventure journey with us and wish you all the best!!!

Nance – with Homesteader’s Supply!