Category Archives: Preserving

How to Enjoy Your Fresh Eggs After the Hens Stop Laying

farm fresh eggs

Anyone who’s ever tasted a farm fresh egg knows they’re far superior to eggs sold at the supermarket. Their yolks are more golden and taller. They’re more nutritious because hens raised on a farm have a better diet than commercially raised hens. And it’s comforting to know they come from happy hens that get to enjoy wandering about outdoors, pecking at bugs, playing on swings, and living a natural, stress-free life.  Have you ever tried freezing eggs after your hens stop laying for the season?

Stock Up on Eggs While You Can!

If you’ve become accustomed to farm fresh eggs, you probably dread the thought of ever eating another supermarket egg again. But with the daylight hours getting shorter as the cold weather approaches, the girls won’t be laying as many eggs, or perhaps none at all. Don’t worry, though, you can still savor the eggs you’ve come to love! Continue reading

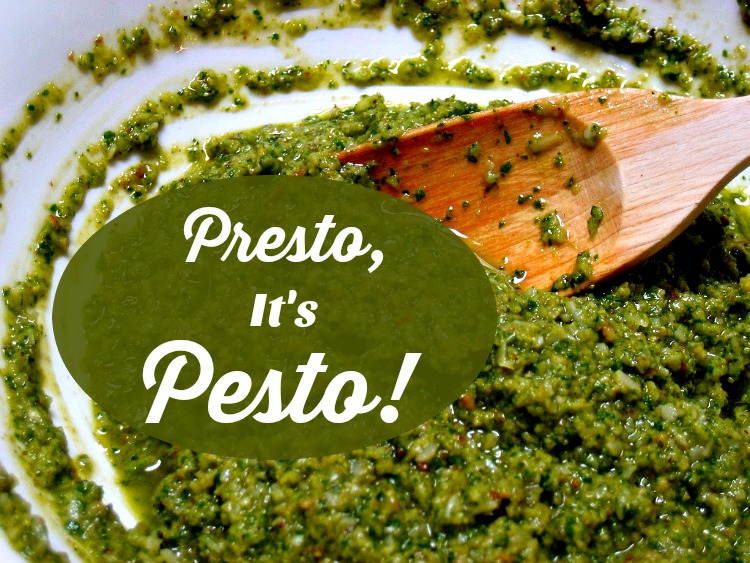
Presto, It’s Pesto! Use Fresh Herbs to Make Savory Sauces

pesto

Ah, pesto! We can thank the Italians for this simple, savory sauce. The traditional version, classic “Pesto Genovese” (recipe below), is so easy to make and has only five ingredients: basil, pine nuts, garlic, olive oil, and parmesan cheese.

There’s no better time to make pesto than when your garden is overproducing herbs at the end of summer. Of course, pesto is delightful anytime! But buying herbs in large quantities at the supermarket off-season can get expensive. So take advantage of those garden herbs now, when they’re practically free! Pesto is a great way to preserve your herbs, too, so you can enjoy them long after your garden has stopped producing. The homemade kind keeps about two weeks in the refrigerator and can be frozen for up to four months. Continue reading

Preserving Your Food Like a Caveman

People have been dehydrating food since cavemen started spreading pieces of meat, nuts, and berries out on rocks to dry in the sun. Dehydrating might just be the oldest method of preserving known to man, but it is still one of the best. Thankfully, we no longer have to wait for a sunny day to dry our food so we can store it until we need it.

Dehydrating Produce

If you live on a homestead or are fortunate enough to have a large garden, then dehydrating veggies and fruits is probably on your to-do list for fall. You can dry bulk produce, or make healthy and delicious snacks like crunchy “cheezy” kale chips in your dehydrator.
Cheesy Kale
Dehydrated veggie chips add extra nutrition and crunch to salads, and are a healthy topping for soups. When dried until brittle, veggies can be crushed into a powder and then used to flavor foods like burgers and smoothies. Similarly, dehydrated fruit can be made into fruit leathers, or added to cereal or smoothies. Or, it can be eaten out of hand as a snack.

Did you know it’s important to not to dehydrate produce at temperatures higher than 105 degrees Fahrenheit?

Gentle, dry heat preserves living foods like veggies and fruits without killing them. Temperatures above 105 start cooking the food, which destroys important enzymes and results in some loss of nutrients.

Dehydrating Meats

You might even want to try your hand at making jerky or pemmican. For the uninitiated, pemmican is a high-energy food that hikers often take on long treks, especially in cold weather. It’s a wonderful food for preppers to keep on hand because it keeps practically forever. Pemmican consists of powdered dried meat mixed with rendered fat, with maybe a few berries added. The Inuit people have been known to live on nothing but pemmican and melted snow for weeks at a time. If you’d like to try making pemmican, Mark’s Daily Apple has a great recipe, complete with photos.

Continue reading

Salt Pork

The piglets arrived in late June. They ate all our food scraps, lots of spent plants from the garden, grass and clover in their pasture, and some commercial pellets. During a harsh old spell when the overnight temps dropped close to 0* they enjoyed a can of cracked corn each and extra flakes of hay. Everything was late except the cold weather. I was concerned about Red and White staying warm, and that maybe there wouldn’t be enough fat for salt pork.

There was no need for concern. I made put up 36 pounds of salt pork today. It will sit at the bottom of the cellar stairs, hovering above freezing, for the next month. I’ll check it weekly to be sure it’s curing rather than spoiling.

salt pork

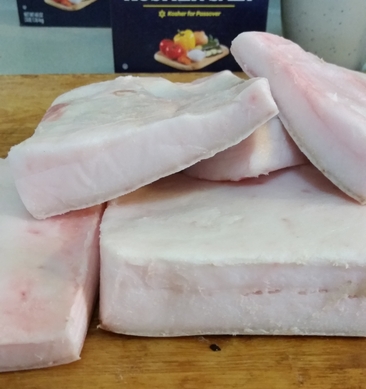
Uncured pork belly.

I wasn’t able to find the tons of information I expected on curing pork, specifically how to make salt pork, online. Turns out there’s not a lot to write about. It’s a simple process.

My pork belly was cut into slabs, vacuum packed and flash frozen by the butcher. I thawed the pork overnight in a cooler.

You’ll need a container for your pork. A crock is great. If you don’t have a crock you can use stainless steel, plastic or glass. Wash your container thoroughly.

Salt Pork Recipe

Cut 2.5 pounds of pork belly into slabs that are six to eight inches wide. Rinse each piece with cool water and dry well with paper towels.

For each 2.5 pounds, mix together:

10 oz Kosher or sea salt
1/3 cup white sugar

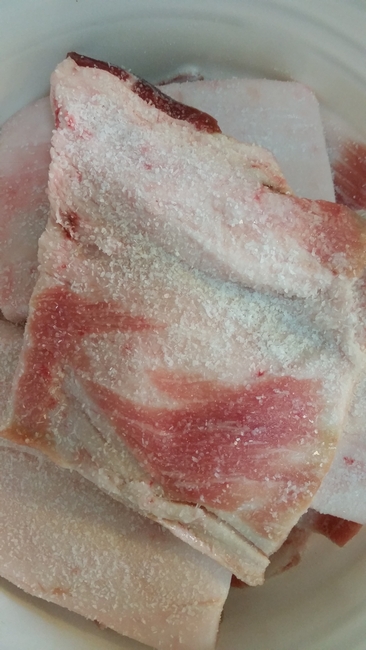
That’s it. This is very basic. Coat each piece of pork belly and stack them close together in your containers.


I put a 1/4″ layer of salt and sugar on the bottom of the container before placing the first pieces. Add more salt and sugar blend to the pieces to make up for any you lose when moving the fat. More salt than necessary isn’t better. You don’t want your salt pork to be so salty it’s hard to use.

salt pork, how to make salt pork

My container of salt pork is sitting at the entry of the cold cellar (they lead in from outdoors so it stays cold), on the cold side that hasn’t been blocked to keep the cold out. I’ll check it every few days, and I plan to let it cure for at least a month. When it’s done I’ll wash the salt off, dry the salt pork well, and vacuum pack it before placing it in the freezer. My cellar won’t stay cold

One of the first recipes I’ll use the salt pork in is Boston Baked Beans. They’re a traditional Saturday meal around here. I’ll slice the salt pork and place it on top of the beans. The pork will help the beans stay moist and the meat will be delicious. I’m also going to dice pork to fry pan fried potatoes and saute mixed greens.

There’s always a little concern about using fat. Moderation! Use a little, only what you need. Use the same caution with salt pork that you use with butter and all other fats. This fat is all natural real food. Enjoy!

Butternut Squash Soup Recipe

Butternut Squash Soup Recipe

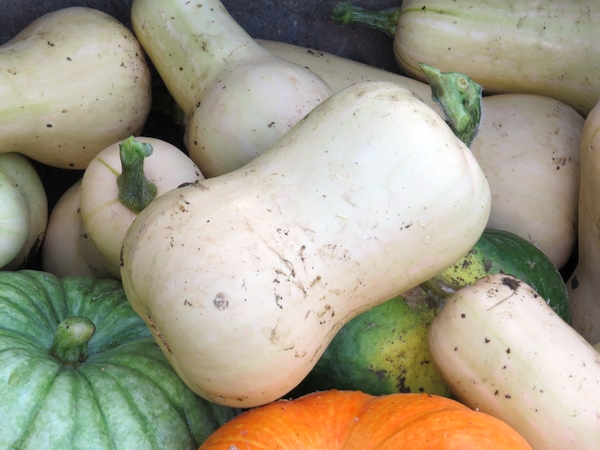
Butternut squash

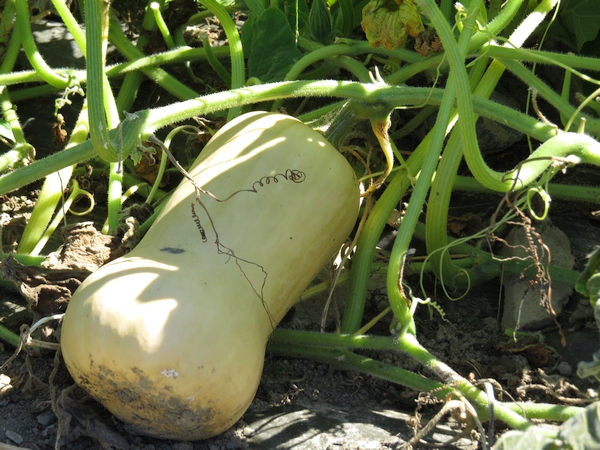
Butternut squash, so fresh it’s still in the field

The first and second killing frosts came last week, first on Thursday and then on Friday mornings. Some of the winter squash and pumpkins weren’t quite ready to be picked but nothing goes to waste on the homestead. The pigs and poultry are happy to eat the unripened squash. The plants, nearly black a few days later, will feed the micro herd in the soil.

One of my favorite ways to use butternut squash is in soup. It’s creamy and rich, has a hint of nutmeg, and can even be a little spicy. If there’s a winter squash you like more than butternut you can use it instead. A variety that isn’t stringy works best.

Saute two cloves of garlic and one medium onion in EVOO
Peel and seed two pounds of butternut squash, and cut into two inch pieces
Peel and core one medium apple, sliced

Simmer the butternut squash and apple in four cups of chicken stock until squash is cooked. Add onions and garlic, and puree in a blender or with an immersion blender.

Sauteed diced onion and garlic until golden.  Add cider and simmer five minutes. Sautee apple in butter until tender. Add chicken stock and squash, cover and cook until squash is tender. Add apple to the pot.  Puree either in a blender or with an immersion blender until smooth. Stir in 1/2 cup of cream and nutmeg to taste.  Serve warm.

This stores in the fridge for up to a week.

For variations, you can add apple or pumpkin pie spice in place of nutmeg. To add a bit of spiciness, slice a four inch piece of Chirico or Linguica into 1/4″ pieces and pan fry to remove some of the fat and improve flavor, and add to the soup before pureeing.

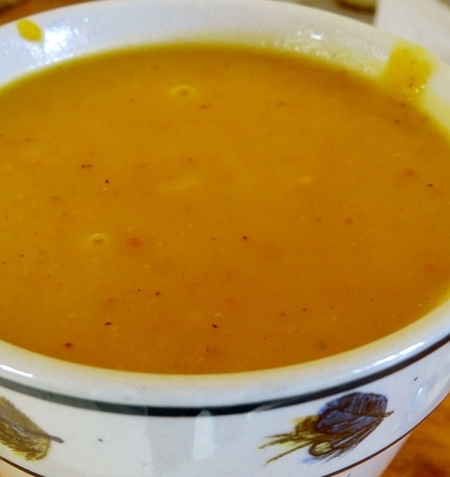
butternut squash soup

A cup of butternut squash soup

Winter squash is simple to grow. You’ll need space enough in the garden for the vines to spread, and that amount of space depends on the variety of squash you grow. You can start seeds indoors three weeks before the average last frost date for your area and transplant the seedlings, or start the seeds in the garden. Plants should be from three to six feet apart. The longer the vines grow the further apart the plants should be placed. The soil should be rich with compost and as weed free as possible. The vines will grow together by mid summer and help control the weeds.

Watch for pests such as squash vine borer, cucumber beetles and flea beetles, and treat as necessary.

Butternut Squash

Butternut Squash

Harvest mature squash before first frost or cover the plants with a heavy sheet or blanket the night before expected frost. Wait until the sun has warmed the cover before removing.

Cut the squash from the vine and store out of direct sun and rain for 10 days. Most varieties of winter squash will store in a cold cellar, cool closet or even under the bed for several months. Check the stored squash every two weeks while in storage for signs of soft spots or spoiling, and use squash starting to go by first. If necessary, winter squash can be frozen.


Time Management Tips for the Homestead

I love reader questions. Did you know that? I love to open a reader’s email and see what they have to say. I’m going to answer a question here.

“You talk about having a lot to do this time of year but you haven’t told us everything you do. What do you do and how do you fit it all in?” ~Rhonda
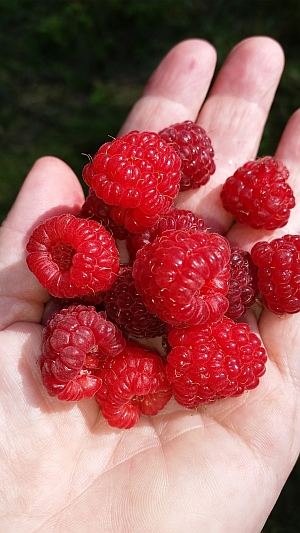
Raspberries freeze well

Raspberries freeze well

This time of year feels like it’s busier than others but in reality, I’m probably feeling more rushed. Homesteading can be a full time job and if you’re already working a job, it can be stressful.

The first killing frost is hanging over our heads any time after the first week of September. It might be early or it might not happen until October. The first frost could come early and then we’ll be frost free for weeks. It’s too late for the tomatoes, squash, cucumbers and other warm season crops once they’ve been frost killed no matter how good the weather is after so there’s the rush to force the plants to produce.

The late raspberries are ripening and the wild blackberries are still going gangbusters. Making jam and jelly is simple but it’s time consuming. I have more time in the winter than right now they’re being frozen in a single layer on cookie sheets. I don’t think these berries make the best jam after they’ve been frozen but freezing them makes it easier to make jelly. They skins burst when they’re frozen so they let go of the juice easily as they thaw.

  • Tip: Freezing strawberries saves time during the summer. You’ll make thicker jam with less pectic and sugar and have juice for jelly when the berries thaw.
Deluxe Stainless Steel Food Mill

Deluxe Stainless Steel Food Mill

Apples don’t have to be sauced, jellied, pied or otherwise put up immediately. You have at least a few weeks, and sometimes months, to get them processed. I picked a bushel of apples one day last week. They were roasted another day and then stored in the fridge. On day three I put them through the food mill (if you don’t have a food mill, you need one). I warmed the apples turned applesauce on the stove, added sugar and spices, and hot water bathed the batched. It took a little time on each of three days but I didn’t have enough time in one day to do it all. Do what you can when you can and it will come together. A little time here and there resulted in 18 pints of sauce.
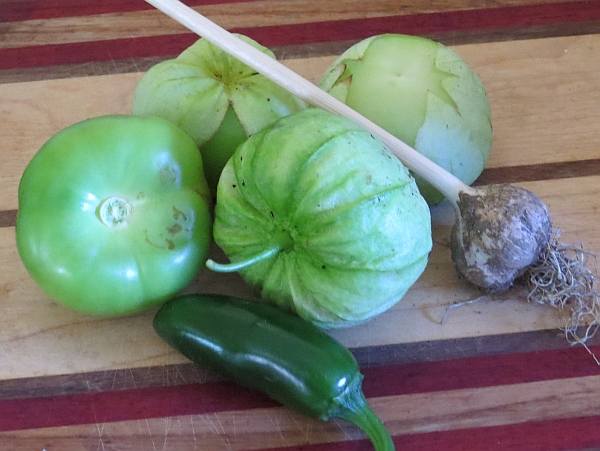
Salsa Verde Ingredients

Salsa Verde Ingredients: tomatillo, Jalepeno pepper, garlic. Missing – onion and cilantro, to be pulled and picked in a few days.

  • Tip: If your tomatoes are not ripening fast enough you can push a spade into the ground around the roots to stress the plants. Cut 12 inches from the base of the plant, severing the roots. A plant’s mission in life is to reproduce. You’ll speed up ripening this way.

The garden is still producing well. Tomatoes, eggplant, tomatillos, squash, pumpkins, cucumbers, kale, cabbage – just about everything is still growing. It all has to be weeded, watered when we don’t have enough rain, picked, preserved or stored – you know how it goes with the garden. This morning I picked close to a half bushel of tomatillos for salsa verde. It’s also hunting season. I can’t put hunting in the freezer so move over berries and vegetables, the tomatillos are coming in. Tomatoes can also be frozen. I like having the warmth from the oven early in the morning on a chilly day as the tomatoes or tomatillos roast. An hour or two with the oven on replaces the small, hot, quick burning fire I usually build on a late fall morning.

  • Tip: When your pumpkins and winter squash start to get soft spots, clean them up and roast them first thing in the morning, then freeze the flesh. This is usually a mid-winter project when I start checking on vegetables stored in the root cellar.

Firewood is weighing heavily on my mind these days. It was delivered late so I’m rushing to get it split and stacked to dry. Best made plans and all, I couldn’t depend on someone when it came to firewood so I was stuck with making the best of a bad situation. It happens. I’m working on eight cords of beach, ash, maple, yellow birch and white birch. The hydraulic splitter makes the work a lot easier but it’s still not an easy job on a hot, late summer day.

  • Tip: Secure next year’s firewood supply now and ask that it be delivered in spring. We burn up to six cords a year. I buy eight cords a year which means we a year “off” now and then without the expense and work, and won’t run out of wood.

Pigs, ducks and chickens are growing out back. They’re turning grass, insects, weeds, food scraps and a few commercial pellets into meat that will feed my family. Portable fences and chicken tractors need to be moved daily. Two people moving fencing takes me a third of the time it takes when I have to do it alone. Ask for help.

When did the paint start peeling off the hen house? I swear it was fine yesterday. Or I was too busy to notice. I’m not sure it’s going to get painted before the snow flies. If there are a few extra dollars I might hire someone to do it for me. It would take someone who likes to paint less than a day to do it. It takes me more than a day to fumble through scraping and painting. We can’t always do it all. Remember when you first started to daydream of homesteading? It was so idyllic. You’d spend days outdoors in the beautiful weather doing your chores? The mosquitoes weren’t part of my daydream. Neither was heat rash. Rainy days would be spent inside, cooking and ready. Painting the hen house was not in my day dream.

  • Tip: Neighborhood kids are often willing to do some work if you pay fairly, and you might be surprised at how well they work. I pay by the job rather than the hour. I don’t want to pay for the time they spend taking selfies and texting.

Plan to use the oven early in the morning or later in the day to warm up the house. It can do its work while you’re doing something else.

  • Tip: The final muck out of stalls and pens doesn’t have to happen when the animals leave for slaughter. Give your attention to the work that must be done at time and get to the stalls, pens and the hen house before the ground freezes and you’ll be all set.

Do you have a time management tip to share? Please leave them in comments!