Category Archives: Homesteading

We’re giving away a Fermenting Kit!

Celebrate the Harvest

It’s Homesteader’s Supply week! We are giving away the Fermenting Kit AND a $35 gift certificate!

fermenting kitHomesteader’s Supply and Countryside & Small Stock Journal invite you to preserve the harvest and reap the many gifts the earth provides this time of year. Click on the photo or link above to enter.

Enter weekly to win a prize package from one of our sustainable living sponsors. Your weekly entry will also be included in the grand prize drawing (value of $5,000) in September!

cys-harvest-FB-variants-1


Reasons You Should Buy Locally

The gardens are producing, we’re putting up food and there are vegetables and fruits to share, but do we have enough of all we want? If not, let’s do what we can to buy locally.

Do you know how old your grocery store purchased fresh vegetables are?  According to the Economics of Food, Farming, Natural Resources and Rural America Economic Research Service, which is part of the USDA, food travels an average from 1500 to 2500 miles, depending on what it is and where it was grown or raised, from the field to your dinner table.  Your food will be much fresher than its grocery store counterpart that needed 7 to 14 days to reach its destination after being picked.  That’s a lot of traveling, time and fuel to get that food to you.  Every day thousands of semis are on our interstates bringing food to us.

According to the Ohio Ecological Food and Farm Association, fertilizers, pesticides, herbicides and transportation of food use up a lot of our non-renewable petroleum.  They say one fifth of all petroleum in the United States is used in agriculture alone.  If you shop at a farmers market, farmstand or are a CSA customer you’re food will have maximum freshness, contain less packaging and use less fuel for transportation.  Fewer emissioins will be produced which will help to keep our air cleaner.  You probably won’t find styrofoam trays and plastic wrap (petrochemical products) used as packaging at your local farms.  You’re more likely to find baskets of unpackaged food to choose from.

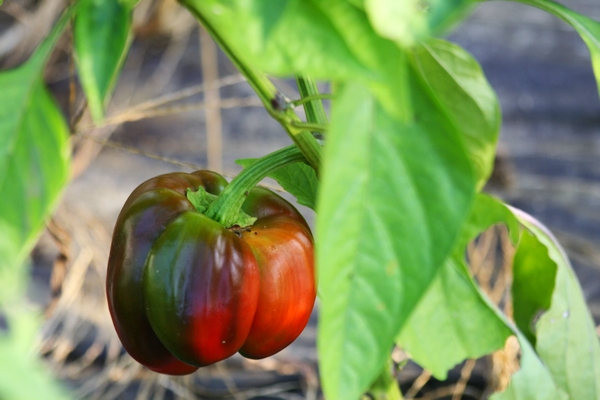
bell pepper, buy local

Nutrient content starts to decline after fruits and vegetables are harvested so the sooner you have them on your plate the better.  According to David Suzuki, loss of nutrients also comes from picking unripe fruit so that it will last extended time in transport.  Additionally, he also says chemicals are often used to prevent mold and fungus from growing during transportation and storage.

Shopping locally keeps your money in the local economy longer.  If the farmer spends that money in the community the local economy benefits from those same dollars again. You’ll also help create local jobs.  Farms need workers.  And don’t worry about cancelling out a job at the big box store.  We’re no where close to having that much locally grown food available – but there’s hope!  The Buy Locally movement continues to spread and gain followers as people learn more about its importance.

cherry tomato, grocery shopping is expensive

Juliet tomato

Grocery stores don’t offer the unique varieties you can find on farms. Grocery stores must have produce grown to look appealing and hold up well during transportation.  According to Mary Choate, author of “A Good Tomato in Winter, Where?” most fresh fruits and vegetables produced in the US are shipped from California, Florida and Washington.  Food has to hold up to handling, being bumped around a lot, and long rides to stores.  You don’t get as many varieties because of this.  Thin skinned tomatoes, for example, often taste wonderful but they’re more prone to cracking during the rough handling they’ll get.

You’ll support family farmers.  Since 1935, the United States has lost 4.7 million farms.  Fewer than one million people claim farming as their primary occupation now.  That’s terrible.  We need more farmers growing and raising healthy food closer to our homes.  In order for those farmers to run sustainable farms we need to show them our support.  When you support your local farmers you know where that food is coming from.  What do you know about food imported from foreign countries?  You can see the growing practices they use for vegetables and fruits.  Chickens and turkeys raised on pasture have very different lives than their commodity farm raised counterparts.  Pasture, fresh air, sunshine, eating bugs and grass like birds are meant to do, and natural fertilizing as manure is dropped versus cement floors with litter to collect manure, no sunshine, no natural foods, not moving around to catch bugs: it’s an easy choice for me.  The texture of a pasture raised bird is incredible.  You get meat that needs to be chewed and enjoyed.  And, there’s something serene about passing a pasture full of cows, don’t you think?  I grew up in the suburbs.  One of my favorite things was to stand at the fence of a pasture filled with replacement heifers owned by a dairy farm 20 miles away.  I will always love that sight.

Preserve the Harvest! Let’s Celebrate

Celebrate the Harvest

cys-harvest-twitter

Homesteader’s Supply and Countryside & Small Stock Journal invite you to preserve the harvest and reap the many gifts the earth provides this time of year. Click on the photo or link above to enter.

This week’s prizes are a one-year subscription to Countryside & Small Stock Journal, a FD-61 food dehydrator, and a box of Pomona pectin.

Enter weekly to win a prize package from one of our sustainable living sponsors. Your weekly entry will also be included in the grand prize drawing (value of $5,000) in September!


How to Keep Chickens Cool

How to Keep Chickens Cool

The hottest part of summer is here. We think about keeping ourselves cool and if we have chickens, we’re concerned with how to keep chickens cool. If your chickens are spreading their wings, neck outstretched, and panting, they are too hot. These tips will help you keep chickens cool and put your mind at ease a bit.

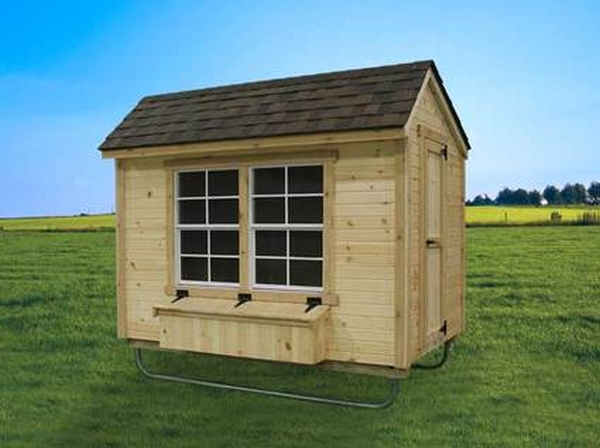
how to keep chickens coolcelebrate the harvest

  • Spray the roof of the coop.
    Cooling down the roof can cool the inside temperature 10° quickly. Spray the roof until the water running off is cool. If you live in a particularly hot area I suggest putting a sprinkler on the roof for convenience. Adjust it so that it sprays only the roof, and turn it on and off at the faucet.
  • Place an exhaust fan at the high point of the ceiling. It will pull the hot air out at the top and the cooler air in through the windows. Let it run all night if possible. Chances are the neighbors have their windows closed and the AC on and won’t hear the fan.
  • Provide shade. That seems like a no-brainer but there might be something here you hadn’t thought of. Shade the windows on the south and west sides. You can hang a curtain rod outside the coop. Leave a couple of inches between the cloth and window to allow air flow. Shade the pen by clothes pinning a reflective tarp on the outside wall. It will provide shade up against that wall and reflect the heat.
  • Chickens will stand in a shallow pan of cool water. I thought at first that I had some chickens that weren’t very bright, then I realized they were doing it only in the summer. Add a block of ice and place the pan in the shade to keep the water cool longer.
  • Make a muddy spot in the shade. It doesn’t need to be dripping wet, just damp.
  • Add a block of ice to their drinking water. I water my chickens outside most of the year because it keeps the coop neater but on hot days, they’re waterer is inside, out of the sun.
  • If possible, let them spend the day on grass in the shade.
  • Freeze water bottles and place them in the coop. It might take them a while to figure out but eventually they might start using them.
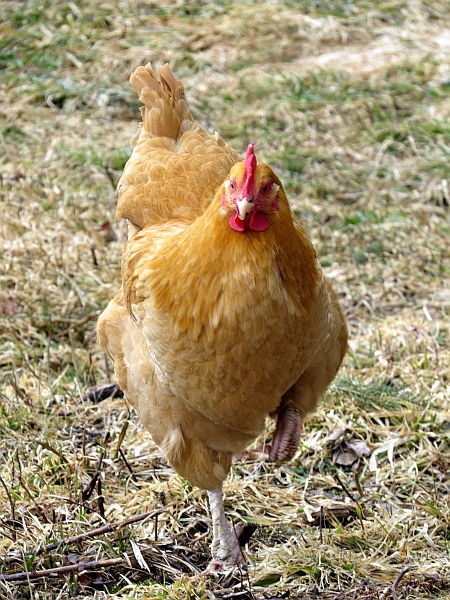
Buff orpington, layers, laying hen

Buff Orpington

If you discover a chicken in serious distress you should cool the bird by submerging it in cool, not cold, water. Let it shake off and dry indoors or in a cool corner of the barn. Be sure the chicken is drinking. If you think it needs a boost, mix up a batch of homemade electrolytes.

Homemade Electrolytes

1/2 gallon of water
1/2 tsp salt
1/2 tsp baking soda
2 tsp sugar

Remember to keep air circulating, provide shade, and act quickly when you have a chicken in distress. Stay cool!

Getting Started in Beekeeping, Part II

This week’s blog was written by Dave Lenweaver. It’s the second part to last week’s blog, Why Now is the Perfect Time to Start Beekeeping.

How expensive is beekeeping?

You can get your start in beekeeping with equipment for about $200-$250, the bees will be another $120-$150 depending on your area and if you buy nucs or packages.

New beekeepers should start out as early in the spring as one can obtain bees. This gives the bees a chance to build up and be ready for nectar and pollen season, at least in the norther parts of the country. Southern parts of the country have longer nectar and pollen seasons and you may be able to start later.

If the colonies are weak going into winter you stand a good chance of losing them to cold or starvation. Hive loss can be as great as 60% of an apiary without the challenge of a weak colony so be prepared with good strong bees.

In addition, you will want to have at least two additional supers per colony ready to add when the nectar is flowing or the bees want to swarm. Beekeeping is no fun when you are scrambling to find equipment to add to a packed colony.

None of these costs include an extractor, which can cost as little as $150 or as much as $1,000 and up.

Is beekeeping time consuming?

Yes and no. For the most part you will install your bees and walk away with occasional checks on the colony for pests and overall health of the colony. you should check your bees every week to two weeks, which as you become more experienced will take as little as 10 minutes per hive to as long as 30 minutes if you are nosy. As you progress you’ll soon realize that the less you poke about the better off the bees are.

When your bees have made enough honey for you to harvest your time investment will increase. Count on at least an afternoon if you have only one colony, longer if you have more.

You’ll also find you are thinking about the bees way more than you would have imagined.

Wrap up

With beekeeping it’s a guarantee you will learn patience. When you are checking the hives you need to move deliberately, slowly, and with purpose. The bees can sense when you are pushing it. You’ll also learn more about the natural world around you such as when trees blossom and their names and characteristics as well. Through beekeeping your interest in other insects will be heightened as you see other bugs in the garden or apiary.

You’ll come to better appreciate the seasons as well. You’ll long for the cherries to blossom and know that the apples, dandelions, and locust trees are coming into bloom soon.

As you can see there are many variables to beekeeping. It can be an exciting hobby while being frustrating at the same time. You’ll jump for joy when you see the queen or evidence she is laying eggs and experience sadness when the colony you nursed through summer dies in the winter. This is the natural world and it isn’t always what we want.

Beekeeping is not difficult, nor is it easy. Especially when things start to go wrong. However, it can be a great teaching experience for children and adults helping to bring families closer together.

Recommendations

Read, read, read, and read. When you are tired of reading watch Youtube beekeeper videos. One needs to be as fully informed as possible going into this hobby. We waited six years before starting our apiary so we would be positive we knew what to expect.

Start with two colonies. Nucs from a local supplier would be my preference. They are accustomed to your local climate and have a better chance of surviving cold or inclement weather. Package bees from Florida or California would have a more difficult time making it through a harsh winter. Two colonies gives you something to compare against as well. If one is strong and one is weak find out why.

Have extra equipment on hand. When the nectar starts flowing or the bees look eager to swarm is no time to go online and order new supers and frames. Have them ready.

Learn to use your judgement and intuition with the bees. You can learn from others’ good ideas and from things that seem real dumb as well. Let someone else do the dumb thing while your bees stay safe and you learn from it. Be aware.

Enjoy the bees. Relax. Grab your tea or coffee, take a chair out to the apiary and watch the bees as they go about their daily activity. Your presence is of no concern to them as you sit to watch them come and go. The big lesson from observation is the bees are fine without our intervention. We are there to assist them when needed and learn of the natural world around them when not. Be silent and enjoy their humming, sniff the air to smell the blossoms and the odor of the hive. Look at the ground to see what new insect you find.

Nature is an amazing teacher and beekeeping can be a portal to a better understanding of the world around us. Enjoy.

Why now is the perfect time to start beekeeping

This week’s blog is a guest blog written by Dave Lenweaver from Clean Slate Farm. Grab a cold drink before you visit Dave and Joanne’s website. There’s so much interesting information there you’ll want to stay a while.

Why now is the perfect time to start beekeeping
beekeeping, honey beeOkay, that’s a little misleading but very good advice. With all the news about honey bees dying and Colony Collapse Disorder (CCD) it seems everyone wants to start beekeeping. But before you jump in here’s some advice from a second year beekeeper.

Take your time and learn as much as you can before getting bees. Being surrounded by thousands of apparently angry, buzzing bees while checking the hive is not the time you want to learn the basics.
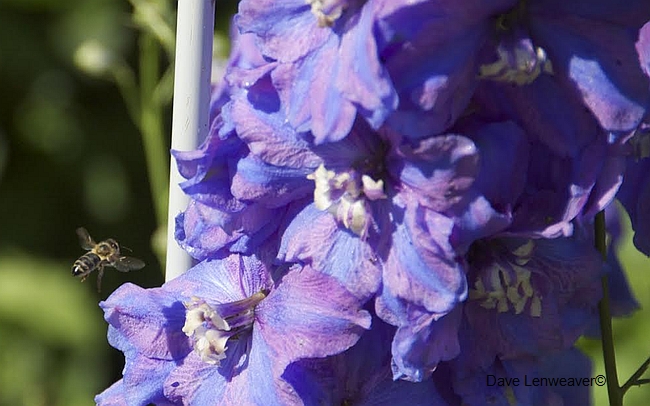
beekeeping, honey beeStart with reading everything you can get your hands on about beekeeping. Some good books to begin with are:

Beekeeping for Dummies, The Backyard Beekeeper by Kim Flottum, The Practical Beekeeper by Michael Bush, and my favorite, Natural Beekeeping by Ross Conrad.

Beekeeping is a hobby of constant learning, and the most important thing you will learn is patience. Which is why you should start reading at least a year in advance of beginning your journey into beekeeping. Any of the above books will give you ample advice and you’ll will find much of it consistent.

There are also many excellent Facebook and Google+ groups dedicated to beekeeping. The moderators of these groups, and many of the participants, are knowledgeable and willing to offer advice on starting up your apiary. Don’t be afraid to ask questions and expect many different opinions. As is so often said in beekeeping circles, ask ten beekeepers a question and you’ll get twenty opinions.

Youtube is an excellent resource as well. You will see many interesting, insightful, and strange practices. Watching Youtube videos is one of the best ways to see what beekeeping is all about and how it is done. Do a search for any aspect of beekeeping and you’ll be informed on how to perform that task. You’ll also find many amusing videos of what not to do.

What you’ll learn from all this reading

All of this information may seem confusing but it’s helping you determine what kind of beekeeper you want to be and will be. In this period of time you’ll learn what makes sense to you and more importantly, what doesn’t.

However, there are some basics no one can dispute. You need at least one beehive and some bees to put in it. A hive is the equipment which houses the bees, a colony is the bees that inhabit the hive. A hive consists of the following:

  •  bottom board
  •  brood chamber
  •  honey super
  •  inner cover
  •  telescoping outer cover

In addition you’ll need:

  • a bee jacket or suit
  • bee gloves, which you may stop using at some time
  • hive tool
  • smoker

Let’s discuss the hive parts in more detail, but not too much. That’s why you’re going to be reading a lot!

The bottom board comes in two configurations; solid and screened. Most hobbyist beekeepers use screened bottom boards for two reasons. The first is for pest management of the varroa destructor mite. A screened board allows you to see any mites which have fallen off the bees and land on a panel below the board. If you see a lot of mites on the panel it may indicate treatment is necessary. This type of board also allows for ventilation of the hive.

The brood chamber and the honey super are the same thing. A wooden box, or body, full of wax foundation where the bees live and make more bees. What it’s called depends on what is happening inside. If the queen is inside laying eggs, it’s the brood chamber; if the bees are building comb and filling it with nectar its the honey super.

These boxes come in three different depths; deep (9 9/16” tall), medium (6 5/8”), and shallow (5 3/4” tall). Some beekeepers use all deep bodies, some all medium bodies, and some use a combination of all sizes. Northern beekeepers may use all deeps to assist in overwintering the colonies. Some beekeepers use all mediums due to weight. A medium body full of honey weighs less and is easier on the back. Then again some beekeepers use deeps for brood and mediums or shallows for honey.

As if to confuse the issue further, bodies can accommodate 10 frames or 8 frames. The choice is up to the beekeeper. Again, this is primarily a weight consideration. A 10 frame deep can weigh 90 pounds when full while a 10 frame medium will weigh in at about 60 pounds.

An inner cover is placed on top of the last super. It may seem like an extraneous piece of equipment but it does serve a purpose. Bees like to seal off cracks and crevices with propolis, a sticky, gummy substance. They do this to seal out light and drafts. Without an inner cover the bees would seal the telescoping outer cover. Propolis is indeed sticky and If the outer cover were to be sealed to the hive it would be difficult at best to remove it without disturbing the bees.

Should I get a nuc or a package of bees?

This is also a subject that causes a lot of debate in beekeeping circles. A nuc, short for nucleus hive and pronounced nuke, is a box of bees with 5 frames of comb, a mated queen, brood in chambers, with workers and foragers all ready to go.

A package of bees contains about 10,000 bees in a screened in box with no frames of comb ready for the bees to begin collection of pollen and nectar.

With nuc your bees are off to a head start and won’t be wasting time getting up to speed by having to build comb. A package of bees has to start from scratch and it will take from two to three weeks for them to build comb for the queen to lay eggs and for workers to begin foraging.

Nucs are generally local bees of one breed or another while package bees can be ordered in different breeds. In the northern part of the country a nuc may be your better choice because of the head start they have on the nectar flow.

Russian, Carniolan, Italian, oh my!

You’ll soon learn that all bees are not created equal. There are Russian, Italian, Carniolan (car-nee-oh-lahn) and other breeds each with their own temperament and production characteristics. The choice is up to you as the beekeeper, mostly. Sometimes your choice is dictated by what is available. As you read you’ll learn more about each breed to help you make your decision.