Author Archives: Homesteader's Supply

Money Saving Tips for Homesteaders

Money Saving Tips for Homesteaders

We’re taking a break from gardening in the blog for a couple of weeks to help out a fellow homesteader. We received a request from a family who is struggling to make ends meet. They need money saving tips while they work on ways to add income to the family budget. We did some brainstorming and came up with a long list of tips.

    1. Nicky Smith suggests not having a clothes dryer. The amount of money you’ll save in electricity will pay for clothes racks and lines in a few months. Hang your clothes outside when the weather cooperates and near a heat source in the winter. Thanks to Nicky for sharing her tip on Facebook!
    2. Julie Dodd shared her tip on Facebook. “Unplug and turn off every light…not in use…saves a bundle.” Did you know that? That little light on the DVD player, Wii, coffee maker and every other appliance you’re not using adds up over time.
    3. Sue Wickson, another of our Facebook faithfuls, suggests not spending. “Don’t. Spend it.” Period. Just don’t spend money. It’s surprising what we can do without if we flat out refuse to spend the money.
      3.5 Stay out of stores. Do your grocery shopping no more than once a week. Do all of your errands on that day and do go shopping again that week. It takes a bit to get organized but you can do it.
    4. Shop sales. That seems obvious and we all know this but it’s easy to fall out of the habit. Stock up on items that have great sales. If possible, set aside $10 additional money for stocking up on those items. It might be hard in the beginning but after a couple of months it’s worth it.
    5. No soda, fancy coffee, sports drinks, flavored creamers, etc. Drink water. Add a slice of fresh citrus or sprig of mint for variety. Having given up soda 15 months ago, I know it’s hard but it’s worth it. I feel a lot better!
    6. Are you sure you need an extended warranty on purchases? Your state might require manufacturers to stand behind their products for a reasonable amount of time, usually longer than the basic warranty. Look for “implied warranty.” In some states it’s enforced by the attorney general’s office.
    7. Make your baby food. Puree what you’re eating as long as it’s not too spicy, hot, etc. Puree before you add salt, pepper and other seasonings if your child is too young for them. You can freeze the puree in ice cube trays.
    8. Glean. Check with local farms to find out if they allow gleaners into the field to clean up after the harvest. Broccoli side shoots, cabbage that was missed, potatoes that weren’t dug, whatever the vegetable is, it’s worth asking for.
    9. Make your own bread. I pay $6 for two pounds of bulk yeast. That’s the cost of two loaves of not very good bread. For about $1 a loaf I can make larger loaves of excellent bread that’s more filling because it’s higher in fiber and better for us. I mix up my bread at night and let it rise in the cool/cold kitchen. The added heat in the kitchen each morning is nice.
    10. Use your leftovers. Make TV dinners, turn them into casserole, soup or stew, play Restaurant with the kids and let them order off the Leftover Menu, or feed it to the chickens. No food in the trashcan. (Bones and fat go into the woodstove.)
    11. Skip do-dads. Decorate with items you can gather. Skip goodie bags for birthday parties. A homemade useful item in the Easter basket will be used and remembered much longer than a do-dad that’s lost in a day or two.
    12. Love to learn? Try free classes online. Coursera offers a lot of free classes. A quick internet search will turn up more options. Or learn from friends and neighbors. Learning a useful skill can lower or eliminate a repair bill some day.
    13. Are you a blogger with a good following? Test products and blog about them. You get to keep the product in exchange for an honest review.
      chicken_hat2
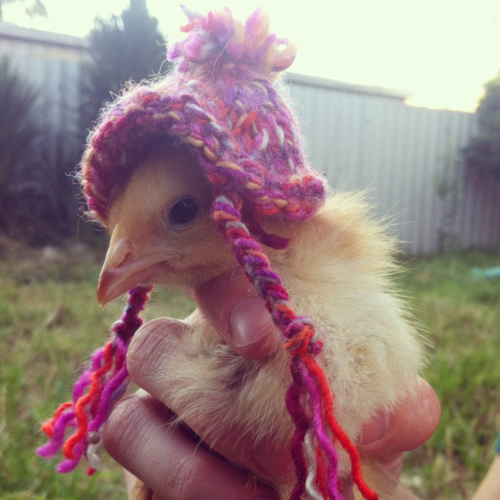
    14. Don’t keep egg laying chickens or ducks unless you’ve crunched all of the numbers and know you’re not losing money, and if someone nearby sells eggs. By the time I pay for fencing, nest boxes, shelter, food and all the other expenses I don’t save any money raising them myself. I’d stop raising layers if I could buy them locally.
    15. Buy quality. You don’t have to buy items brand new. Shop at thrift stores and pawn shops for lightly used items in good condition. If you buy quality once it’s less expensive in the long run than buying inexpensive items that don’t last.
      15.5  Try pawn shops later Friday or first thing Saturday after items have been pawned for weekend money. Leave a list of what you need and your name and contact info with the shop.
    16. Limit dry cleaning. Spot clean when necessary. We take our wool pants and vests to the dry cleaner in the spring. That’s it. Once a year.
    17. Sell what you don’t need. If you haven’t used something for a year you probably don’t need it. Earn some extra cash to put toward the extra $10 on stocking up on grocery sales.
    18. Have an energy audit of your home. Cover windows with shrinking plastic. You dry it with the hair dryer and it shrinks to fit and is clear. Use towels or blankets on the windows on the coldest nights. Caulk leaks.
    19. Close off the heat to rooms you don’t use. We don’t heat our bedrooms. Instead, we have heated mattress pads and an extra blanket. The mattress pad warms up the bed for about an hour before we go to sleep. It’s warm and cozy and we stay that way overnight.
    20. Avoid expensive household cleaners. Vinegar does a great job of cleaning.

We’ll continue this next week. There are still a lot more tips to share.

What to Grow in the Garden – Cucumbers

What to Grow in the Garden – Cucumbers

What’s a salad without cucumbers? We need them to add to the tomatoes and peppers. There’s nothing like a fresh cool cucumber sliced thin, salted and mixed with mayonnaise, and piled high between two slices of homemade bread. It’s a summer sandwich we wait months for and enjoy for such a short time.

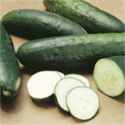
Straight eight cucumber, cucumber, what to grow in the gardenYou can choose your cucumbers based on the amount of space you have if need be. There are bush varieties suitable for small spaces.  Short vined cucumbers work well in large hanging baskets or wrapped around tomato cages, and long vined varieties that do well on hog or cattle panels, clipped to twine or across trellis. And of course, if you’ve got the space, let them sprawl in the garden.

Cucumbers can be direct seeded in rows or mounds. Amend the soil before planting the seeds. If you’re planting in rows you’ll want to thin the plants to 18 to 24 inches apart. In mounds, plant three seeds in a two foot wide by one foot high mound and leave the two strongest seedlings to grow. If you have a blank spot you can use the third seedling to fill in. Mounds of soil warm faster and drain well but you’ll need to keep an eye on the moisture to be sure they don’t dry out before the roots have reached level ground.

If you want to get a head start on the season you can start your seeds indoors in seed starting medium about a month before you’ll transplant the seedlings. Transplant when the second set of true leaves is forming and before the plants become root bound. Root bound vine crops will be stunted. They are fussier about their roots than most other vegetables.

If you notice tiny cucumbers dying you’ve got a pollination problem. You can hand pollinate them buy moving pollen from a male flower (no cucumber at the base of the flower) to the female flower using a small paint brush or Q-tip.

Straight Eight is our all time favorite slicing cucumber. It’s an heirloom variety that requires about 65 days to maturity. It is prolific so you’ll want to check the plants for mature cucumbers every day or two. You may prune back new shoots on the vines to keep growth concentrated in the cucumbers. Straight Eight is a straight eight inch cucumber great for those cucumber sandwiches.

Water well. Cucumbers that don’t get enough water will be misshapen and bitter. They benefit from soaker hoses that slowly drip water close to the roots and keep the soil moist six to eight inches down. Over watering can lead to tasteless cucumbers but in the summer heat that’s usually not a problem.

To prolong the harvest I plant seeds one week after planting the cucumber transplants. When the transplants have played out the seeded plants will still be producing. Cover the plants when there’s a danger of frost as these plants are particularly susceptible to frost.

What to Grow in the Garden – Plenty of Peppers

Peppers are another staple in the garden. Stuffed, sliced for salad, chunked for dip (cut them into big pieces like those popular corn chips), sauteed for spaghetti sauce, pizza topping – the pepper is a go-to from the garden.

What to Grow in the Garden – Peppers

bell pepper

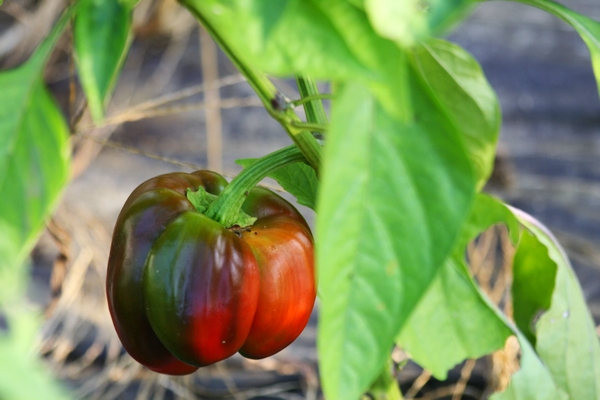
The last bell pepper of the season

[subscribe2]

  • Bell, commonly known as “green peppers” are the most often grown peppers in the family garden.Bells are also know as sweet peppers. Bell peppers usually start as green and change color when they ripen. They’re edible when they’re green, and probably most are eaten then, but they develop better flavor and increased nutrition when ripe.
  • Hot peppers vary in heat that’s measured on the Scoville heat scale.
    • Sweet, banana and Pimiento are a 0.
    • Ancho and Poblano are 1-2k
    • Anaheim is 0.5 to 2.5k
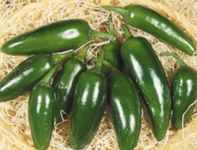
    • Jalepeno is a 2.8 to 8k
    • Chipotle is 5 to 8k
    • Cayenne is 6 to 8.5k
    • Serrano is 8 to 22k
    • Orange Habanero, Scotch Bonnet is a whopping 150-325k.
    • The world’s hottest pepper is the Carolina Reaper at 1,569,300k.
Jalapeno pepper seeds

Jalapeno Pepper

Seeds are started indoors in cool climates. The seeds are slow to germinate unless the soil is very warm, a minimum of 68*. Optimum soil temperature for germination is 80*. A heat mat beneath the seed starting tray will help a lot. Maximum temperature for germination is 95*.

At 68* soil temperature the seeds will germinate in about 13 days; at 77* to 80* expect approximately eight days. At 77* to 80* you should expect 98% germination. Be sure to keep the soil moist but not soaked.

Harden off the seedlings before transplanting. I prefer to transplant six week old seedlings. Choose seedlings that have not become root bound and do not have blossoms. If you have no choice, pull off the blossoms to force the plants’ growth into the rest of the plant.

Amend the soil before transplanting. Add compost and any other amendments your soil needs. If you’ve done a soil test and it shows the soil is low in magnesium now is the time to add it. Peppers require more magnesium than most garden plants.

Hot and sweet peppers are grown the same way. Peppers appreciate a little crowding. I plant mine only 18-24 inches apart.

Have you seen a tip suggesting you spray your pepper plants with Epsom salt? It does help if your plants are pale green or yellowish and lacking blossoms!  Mix one teaspoon of Epsom salt with one quart of warm water. Mix until the salt completely dissolves and allow time for the water to cool to room temperature. Mist the plants with the water and stand back to watch. Within a few days you’ll see the leaves darken to a nice shade of green and blossoms should start to form.

Some varieties of peppers can grow to four feet tall. If necessary, you can stake pepper plants to keep them from falling over. You can also cage them to keep branches heavy with peppers from snapping. If you give them too much nitrogen the plants will become tall and thin and won’t produce well.

Although peppers don’t like cold soil when it’s time to germinate they are a little hardier than expected in the fall. Protect the plants from early frost.

Also see Tomatoes and Cucumbers.

What to Grow in the Garden – Tomatoes

It’s time to plan what to grow in the garden. Yes, yes…it’s only January, but it’s time. A mug of something hot to drink, paper and pencil to sketch the garden plan, day dreaming of warm weather, your hands in the soil and fresh food and flowers – it’s a great way to spend a winter day.

What should you grow in the garden? How much of each plant do you need? Where should it be planted? There’s a lot to consider but we’ll break it down into small items and make it easier.

What should you grow? What do you like to eat?

We’re going to start this series with tomatoes. We’ll talk about peppers, broccoli, cabbage, cauliflower, cumbers, pumpkins, squash and root crops, too. If there’s a vegetable you’d like to read about soon please let us know and we’ll bump it to the top of the list.

beefsteak tomato, beef steak tomato, how to grow tomatoesTomatoes are the all-time favorite. There’s nothing like a vine-ripened tomato, still cool early in the morning, full of natural sugar and juice, fresh from the garden.

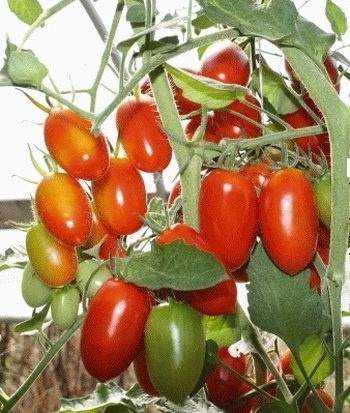
  • Cherry – prolific producers of tiny tomatoes. Cherry tomatoes are the candy of tomatoes. You can pick them and pop them into your mouth without having to slice them or worry about dripping juice and seeds on your shirt. One to two plants per person will be enough to provide you with fresh cherries to eat in the garden and plenty to bring into the house for salad and snacking.
  • Slicing – thick slices of tomato on a BLT or cheeseburger come from slicing varieties. One or two plants per person should provide enough fresh tomatoes for the house and more to share with friends in a good year. In an iffy year with cool weather or too much rain, that should be enough for the household.
  • Paste tomatoes – the varieties used for sauce, paste and stewed tomatoes. This one is a little trickier to decide. Production between varieties can vary a lot, the thickness of your sauce and stewed tomatoes is a personal choice, and how often you’ll want to use a pint or quarter is subject to your menu. The best thing about these tomatoes is that if you put up more than you use in a year they store well. Four plants per person is a conservative number. If you don’t have enough paste tomatoes you can substitute with cherry and slicing tomatoes but will need more of those per quart of end product because they aren’t as meaty and have more juice.

Tomato plants can be as short as three feet tall and strong enough to support themselves to more than 20 feet long, clipped to twine and sprawling over support. Choose your varieties based on how big the plants will be at maturity and how much space you have for them.

cherry tomato

Juliet tomato

Most varieties need support. It can be as simple as a tomato cage or as involved as a solid frame. Twine strung from the frame can be used to clip the vines to. This method is labor intensive as it requires clipping and pruning several times a week but it produces large amounts of fruit.

Determinate varieties of stop growing at their full height and ripen most of their fruits in a short time. They’re best for limited space and short growing seasons. If you want a lot of paste tomatoes at once for canning, chose a determinate variety.

Indeterminate varieties of tomatoes continue to grow. They continue to produce fruit as they grow. They’re harder to control and require more pruning but if you have a long growing season and the space for them they’re a great way to go.

Deep watering once or twice a week is much better for tomatoes than frequent, shallow watering. Roots will grow deeply into the soil, pulling up nutrients and giving large plants a strong base. Adequate watering helps prevent blossom end rot (BER). Roots pull calcium into the rest of the plant as they bring in water. Shallow watering can causes problems when you get large amounts of rain. The tomatoes won’t be used to a lot of water, will grow too fast and the skins will crack.

Next week we’ll talk about cool weather crops.

See also: Peppers and Cucumbers

Hunting Small Game

Hunting Small Game

We’re going to talk about hunting small game this week. We asked followers on Facebook what they’d like to read and/or learn about a while back and hunting small game was one of the suggested topics. Hunting was a given decades ago. If homesteaders wanted meat on the table they hunted because they didn’t have livestock to move with them when they settled on their land.

Hunting small game can provide meat on the table and it’s a means of keeping the pest population in check. Pests can do a lot of damage to a garden. Eliminating a pest, minimizing damage and providing meat is a win-win-win situation. Have you ever considered woodchuck stew? It’s been said that they taste best when they’ve been eating your best vegetable plants.

[subscribe2]

hunting small game, hunting game birds, game birds, upland game birds

Red squirrel

Small game is generally considered to be small mammals and birds such as:

  • Squirrel
  • Hare
  • Rabbit
  • Woodchuck
  • Prairie dog
  • Grouse (partridge)
  • Chukar
  • Quail
  • Pheasant
  • Woodcock
  • Dove

Laws vary between states. It’s important to become familiar with your state’s laws to keep yourself out of trouble, keep yourself and others safe, and for the benefit of the animals you’re hunting.

What weapons are you allowed to use? Most hunters use firearms for small mammals. A .22 caliber rifle is large enough to do the job. It’s a small, light weight rifle with little “kick” and fairly quiet. It’s suitable for everyone learning to hunt and young hunters. A .177 air rifle might do the job for small squirrels though it can be tricky. You absolutely must hit your target precisely otherwise you’ll only hurt the animal. Winter is hard time to use a small rifle like the .177. Even when the air pressure is high, the pellet might hit a non-lethal area of the body, bounce off and roll away.

There are exceptions but birds are hunted with shotguns as a general rule. The smallest shotgun we use for bird hunting is the .410. It has a short range and is useful for small birds like dove, partridge and woodcock. It’s a great starter shotgun but will probably be outgrown quickly.

Next up is the .20 gauge shotgun for small birds. For partridge and larger birds we use .12 and .10 gauge. Large birds such as turkey and goose require heavier loads and longer shells to bring the birds down humanely.

You might choose a shotgun for small game. If I’m partridge hunting with a .20 or .12 gauge and happen to have a good shot at a snowshoe hare I’ll take the shot. I wouldn’t hesitate to shoot a squirrel with a .410 as long as I weren’t too close to the squirrel. Place your shots well.

Tip  Read boxes just like you read a food label for ingredients. The box should tell you the gauge, length, FPS (feet per second, or how fast the shot travels), oz (ounce) shot, and shot on shotgun shell boxes.

Tip Bullet boxes for rifles are labeled similarly. Many manufacturers clearly label their boxes with the game the bullet is suited to. Study up. Start with .22 for hunting small game.


Salt Pork

The piglets arrived in late June. They ate all our food scraps, lots of spent plants from the garden, grass and clover in their pasture, and some commercial pellets. During a harsh old spell when the overnight temps dropped close to 0* they enjoyed a can of cracked corn each and extra flakes of hay. Everything was late except the cold weather. I was concerned about Red and White staying warm, and that maybe there wouldn’t be enough fat for salt pork.

There was no need for concern. I made put up 36 pounds of salt pork today. It will sit at the bottom of the cellar stairs, hovering above freezing, for the next month. I’ll check it weekly to be sure it’s curing rather than spoiling.

salt pork

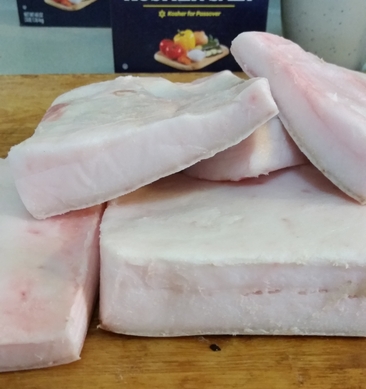
Uncured pork belly.

I wasn’t able to find the tons of information I expected on curing pork, specifically how to make salt pork, online. Turns out there’s not a lot to write about. It’s a simple process.

My pork belly was cut into slabs, vacuum packed and flash frozen by the butcher. I thawed the pork overnight in a cooler.

You’ll need a container for your pork. A crock is great. If you don’t have a crock you can use stainless steel, plastic or glass. Wash your container thoroughly.

Salt Pork Recipe

Cut 2.5 pounds of pork belly into slabs that are six to eight inches wide. Rinse each piece with cool water and dry well with paper towels.

For each 2.5 pounds, mix together:

10 oz Kosher or sea salt
1/3 cup white sugar

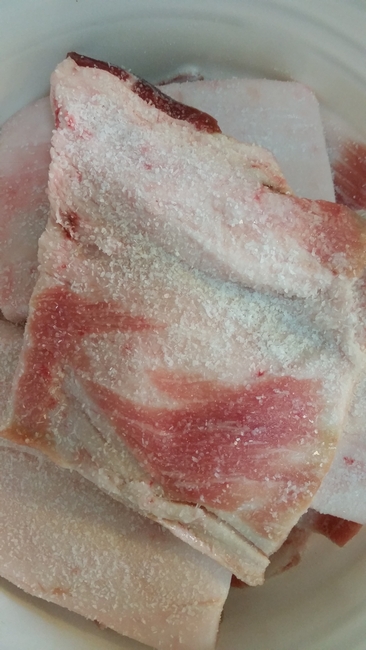
That’s it. This is very basic. Coat each piece of pork belly and stack them close together in your containers.


I put a 1/4″ layer of salt and sugar on the bottom of the container before placing the first pieces. Add more salt and sugar blend to the pieces to make up for any you lose when moving the fat. More salt than necessary isn’t better. You don’t want your salt pork to be so salty it’s hard to use.

salt pork, how to make salt pork

My container of salt pork is sitting at the entry of the cold cellar (they lead in from outdoors so it stays cold), on the cold side that hasn’t been blocked to keep the cold out. I’ll check it every few days, and I plan to let it cure for at least a month. When it’s done I’ll wash the salt off, dry the salt pork well, and vacuum pack it before placing it in the freezer. My cellar won’t stay cold

One of the first recipes I’ll use the salt pork in is Boston Baked Beans. They’re a traditional Saturday meal around here. I’ll slice the salt pork and place it on top of the beans. The pork will help the beans stay moist and the meat will be delicious. I’m also going to dice pork to fry pan fried potatoes and saute mixed greens.

There’s always a little concern about using fat. Moderation! Use a little, only what you need. Use the same caution with salt pork that you use with butter and all other fats. This fat is all natural real food. Enjoy!